




How to Install Elastic Laces in 5 Easy Steps
Table of Contents
- What You Need Before You Start
- Step 1: Remove the Old Laces
- Step 2: Thread the Elastic Laces Through the Eyelets
- Step 3: Attach the Lace Locks and Cord Clips
- Step 4: How to Adjust Elastic Laces for Comfort
- Step 5: How to Trim Elastic Shoelaces for a Clean Finish
- Ways to Lace Shoes Without Tying: Style and Fit Options
- Why Choose uLace for Your Shoes?
- Frequently Asked Questions
Last Updated: September 9, 2026
What You Need Before You Start
Elastic laces are a simple upgrade that removes the daily hassle of tying and untying shoes, turning any pair of sneakers into a convenient slip-on. Before you begin the installation process, gather everything you need so the swap takes only a few minutes per shoe.
Most no-tie lace kits arrive with everything required: the elastic laces themselves, lace locks, and cord clips. You will also want your sneakers clean and unlaced, with the old laces removed. A pair of scissors is essential for trimming later, though some kits include a dedicated cutting tool. Keep a flat surface nearby, like a table or counter, where you can lay the shoe flat and work comfortably.
The installation process works on nearly any shoe with traditional eyelets, from running shoes and canvas sneakers to kids' school shoes and orthopedic footwear (aota.org). Adaptive footwear and slip-on conversion projects are where elastic laces shine most, since they eliminate the need to bend over or manage knots throughout the day.
Step 1: Remove the Old Laces
Start by loosening each shoe completely. Pull the old laces out from the top eyelets down, working them free one cross at a time rather than yanking them through in a single motion, which can stress the eyelets.
Once the laces are out, take a moment to inspect the eyelets and the tongue. Look for any rough edges or burrs that could snag the elastic material over time. If the shoe has metal eyelets, run a finger around each one to check for sharp spots. Addressing these now protects the elastic laces from premature wear.
Set the old laces aside or discard them. You will not need them again, since the no-tie system replaces them permanently. This is also a good moment to wipe down the tongue and footbed if your shoes have picked up any dirt or debris from daily wear.
Step 2: Thread the Elastic Laces Through the Eyelets
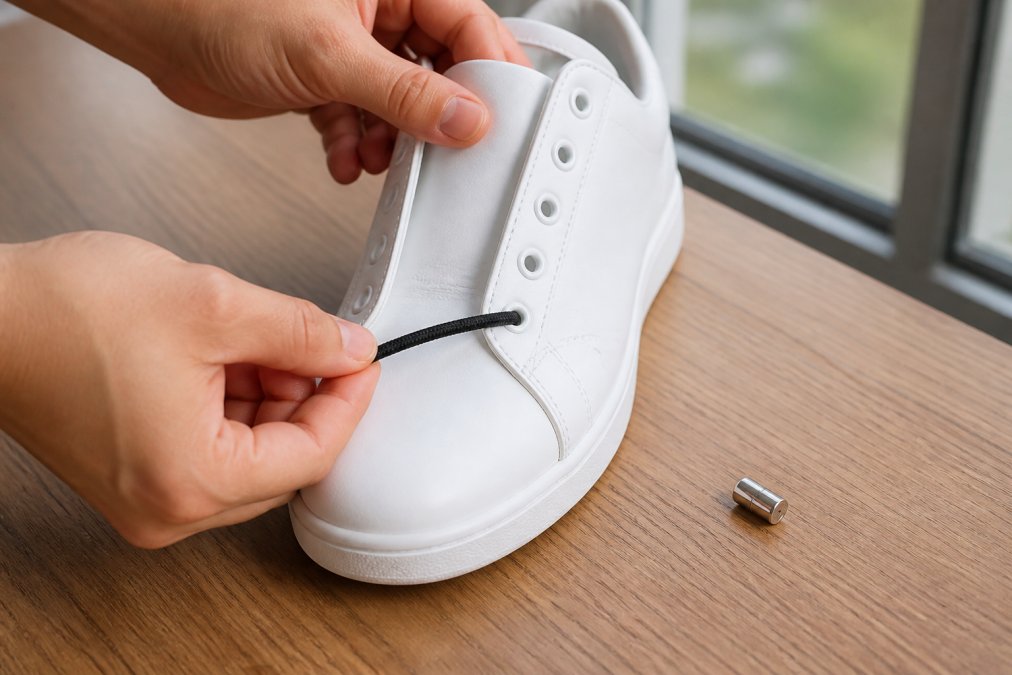
Threading elastic laces follows the same basic path as traditional laces, but the technique differs slightly because the material stretches. Begin at the two bottom eyelets closest to the toe, pushing one end of the lace through from the outside so the aglet appears inside the shoe.
Hold both ends evenly and pull them up so the lace sits flat across the bottom. From here, cross the ends and feed each one through the next eyelet up, working from the inside out. Continue this crisscross pattern up the shoe, keeping the tension light. Pulling too hard while threading will stretch the lace and make the final fit uneven.
The key difference with elastic laces is that you do not need to leave slack for a bow at the top. The lace locks and cord clips handle the closure, so the threading pattern simply needs to be even and snug. On the final eyelet, both ends should exit the shoe and hang free, ready for the hardware.
Step 3: Attach the Lace Locks and Cord Clips
With both lace ends exiting the top eyelets, it is time to attach the hardware that makes the no-tie system work. The lace locks are the small spring-loaded pieces that hold the lace at your chosen tension, while the cord clips secure the excess length neatly out of the way.
Slide one lace lock onto each end of the lace before doing anything else. If your kit includes cord clips that attach to the lace itself, thread those on now as well. Press the spring button on the lace lock to open it, insert the lace end, and release the button to grip the lace in place. preventing boot slippage.
Position the lace locks so they sit just above the top eyelet on each side. This is where they will rest once the shoe is on your foot. The cord clips, meanwhile, are meant to hold the dangling ends. Fold the excess lace back on itself and secure it with the clip, creating a clean loop that will not catch on anything.
Step 4: How to Adjust Elastic Laces for Comfort
The real advantage of a no-tie system is how to adjust elastic laces for comfort, which is far easier than retying a traditional bow. Slip your foot into the shoe and press down to seat your heel properly. The elastic should stretch enough to allow this without forcing your foot in.
Once your foot is in place, check the tension across the top of your foot. The lace should feel snug but not tight enough to cause pressure points or restrict circulation. If the shoe feels loose, open both lace locks, pull the ends to tighten, and re-engage the locks. If it feels tight, reverse the process.
The lace locks let you fine-tune each side independently, which helps if you have a high instep or wide forefoot. Adjust the tension so the tongue sits flat and the heel stays seated when you walk. A properly adjusted no-tie system should feel secure during running performance or active sports without ever needing a mid-day retie.
Step 5: How to Trim Elastic Shoelaces for a Clean Finish
Once the tension feels right, remove the shoe and prepare to trim the excess length. Knowing how to trim elastic shoelaces correctly prevents fraying and keeps the ends from slipping back through the lace locks.
Pull each lace end out of its lace lock and lay it flat. Leave about an inch of lace beyond the lock, then cut cleanly with sharp scissors. A straight cut works fine, though some kits recommend cutting at a slight angle to make threading back through the lock easier.
After trimming, reinsert each end into its lace lock and secure the cord clips. Tuck any remaining excess under the clip so nothing dangles. The finished result should look tidy, with no loose ends flopping around as you walk.
Ways to Lace Shoes Without Tying: Style and Fit Options
Beyond the standard crisscross, there are several ways to lace shoes without tying that change both the look and the fit of your sneakers. The straight bar method, where the lace runs horizontally across each row, gives a clean, formal appearance popular on dress shoes and minimalist sneakers.
For runners and athletes, the heel lock method routes the lace through the top eyelets a second time, creating extra grip around the ankle (peer-reviewed research). This pattern works well with elastic laces because the added friction point keeps the heel firmly in place during lateral movement. People with narrow heels often find this pattern eliminates the slipping that causes blisters.
Lacing patterns can also address specific foot conditions. Skipping an eyelet in the middle of the shoe relieves pressure on a high instep or a bunion, while leaving the bottom eyelets loose gives wider forefeet more room. Because elastic laces maintain consistent tension, these adjustments stay comfortable all day rather than loosening gradually like traditional laces.
Why Choose uLace for Your Shoes?
uLace has been creating no-tie elastic shoelaces since 2009, and the system is designed around a simple push-and-pull installation that takes minutes per shoe. The brand offers a wide variety of styles and colors, from the classic black and neutral tones to vibrant options for kids, so the laces match your personal footwear style rather than forcing you into a generic look.

The benefit goes beyond convenience. Elastic laces from uLace prevent damage to sneakers that comes from forcing your foot in without untying, which crushes the heel counter and distorts the shape over time. They also keep laces from dangling into puddles or picking up dirt, and they provide a more comfortable fit than traditional shoestrings because the stretch absorbs pressure across the top of your foot. For parents managing hectic mornings, the uLace Kiddos line turns shoe-tying struggles into a quick slip-on, and for seniors who find bending difficult, the laces restore independence without sacrificing support. The uLace ProFormance - Performance No-tie Laces - Black are designed for active sports and running, with a secure hold that stays put through a full workout.
The uLace Guarantee backs every purchase, so you can try the system with confidence. Take the quiz on the uLace website to find the right length and style for your shoes, then transform your favorite sneakers into slip-ons that look neat and stay secure all day.
Frequently Asked Questions
How do elastic shoe laces work to keep shoes secure?
Elastic laces work by using stretch and tension instead of a tied knot. As you slip your foot in, the laces stretch to accommodate it, then gently contract to hold your foot securely. The system holds the tension at your preferred snugness, so the fit stays consistent all day without putting pressure on the top of your foot.
How to tighten elastic laces for a custom fit?
To tighten elastic laces, simply pull the loose ends through the system's tension adjusters before you trim them. Put on the shoe and tighten the laces to your desired snugness. The system will lock the tension in place, so you get a secure fit that still allows your foot to slip in and out easily.
Can you use elastic laces on any type of sneaker?
Yes, elastic laces work with most lace-up shoes, including athletic sneakers, casual canvas shoes, and even children's footwear. For low-top shoes with few eyelets, consider a shorter length like uLace Shorts. For high-tops or shoes with many eyelets, the standard uLace Classic length provides enough lace for a complete install.