




How to Teach Kids to Tie Shoes: Step-by-Step Guide
Table of Contents
- Readiness Signs: When Are Kids Ready to Learn?
- How to Tie Shoes Step by Step for Beginners
- The Bunny Ear Method for Tying Shoes
- Comparing Shoe-Tying Methods and Choosing One
- Shoe Tying Practice Activities for Kids
- Troubleshooting Common Mistakes and Adaptations
- No Tie Shoelaces for Kids: A Practical Alternative
- Conclusion
- Frequently Asked Questions
Last Updated: October 19, 2026
Readiness Signs: When Are Kids Ready to Learn?
Most parents start too early, not because their child can't do it, but because the fine motor skills and patience for shoe tying aren't there yet.
Shoe tying is a multi-step motor task that combines hand strength, finger dexterity, coordination, and sequencing. It's genuinely hard work for small hands.
So how do you know when to start? Watch for these signs:
- Pincer grasp is solid. Your child can pick up a small bead or piece of cereal with thumb and index finger.
- They show interest. They watch you tie your shoes or ask to try.
- They can follow two-step directions. "Pick up the shoe and bring it here" without confusion.
- They dress themselves. Pulling on pants and putting on socks solo signals readiness.
Many children hit these milestones somewhere between ages five and seven. A child development resource from the American Academy of Pediatrics notes that fine motor milestones vary widely from child to child.
One insider tip: skip the pressure. A child who feels rushed will resist. A child who's curious will lean in.
How to Tie Shoes Step by Step for Beginners
Here's the simplest way to teach kids to tie shoes: break the process into slow, repeatable steps and practice each before moving on.
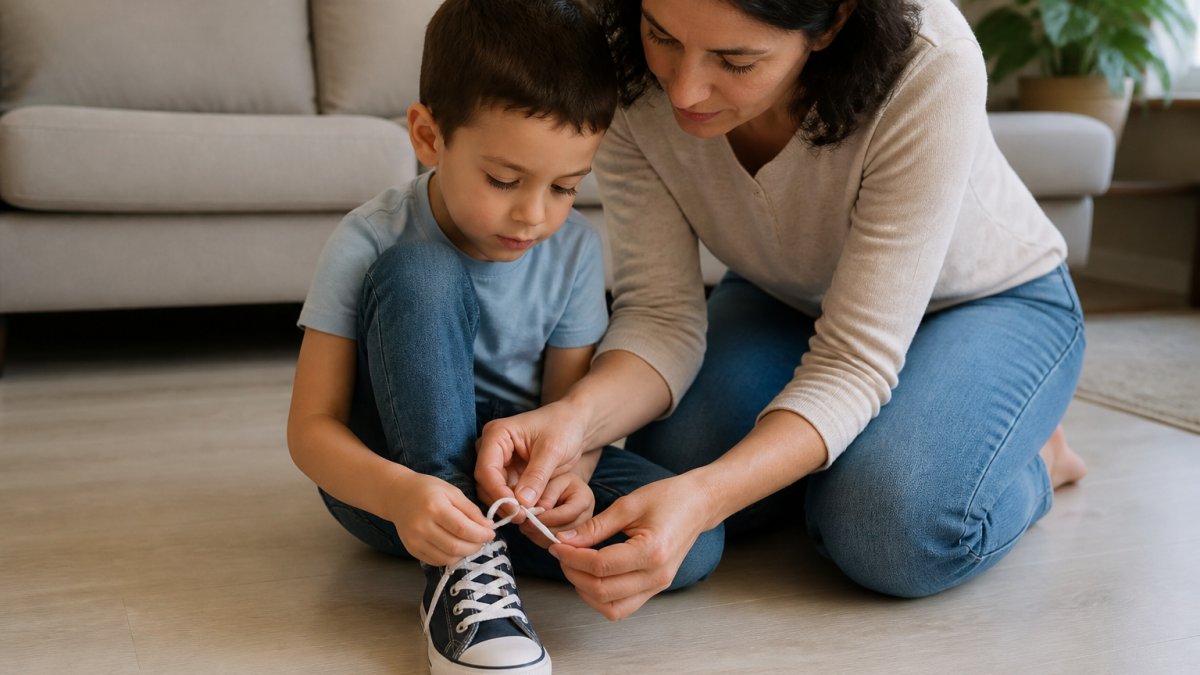
Before you start, set up for success:
- Use a shoe with flat, wide laces (round laces slip and frustrate beginners)
- Sit beside your child, not across from them, so they mirror your hand position
- Work on one shoe only at first
Breaking the Task Into Manageable Steps
- Cross the laces and pull one end under the other to make a starting knot.
- Pull the knot snug. Not tight, just secure.
- Make a loop with one lace end, pinching it between thumb and finger.
- Wrap the other lace around the base of the loop.
- Push the middle of that lace through the hole that forms.
- Pull both loops outward until the bow is snug.
Teach two steps at a time, not all six at once. A common mistake is demonstrating the whole sequence and expecting a child to absorb it in one sitting; most kids need to master steps one through three before step four makes sense. Say each step out loud as you do it, repetition builds muscle memory.
The Bunny Ear Method for Tying Shoes
The bunny ear method for tying shoes is the most kid-friendly approach because it turns a complex motor task into a story. Kids remember stories. They forget instructions.
Here's how it works:
- Make the starting knot by crossing the laces and pulling one under.
- Form two loops, one in each hand, like bunny ears standing up.
- Cross the ears over each other.
- Tuck one ear behind and through the gap.
- Pull both ears gently to tighten the bow.
The rhyme helps: "Make two ears, cross them over, tuck one under, pull them tight."
Why does it work? Both hands do the same motion at once, and that symmetry is easier for young brains to coordinate than the single-loop method, where each hand does something different.
Some kids click with bunny ears in a week. Others need a month of short daily sessions. Both are fine.
Comparing Shoe-Tying Methods and Choosing One
Not every method fits every child. The three most common approaches each have trade-offs, and picking the right one up front saves weeks of frustration. The table compares them on what matters during practice: hand movements required, hand symmetry, and where kids get stuck.
| Method | Distinct Hand Movements | Hand Symmetry | Best For | Main Drawback |
|---|---|---|---|---|
| Single loop | 6 | Asymmetric (each hand does a different job) | Kids who like clear, numbered steps | The wrap-and-push step confuses kids who need both hands doing the same thing |
| Bunny ears | 5 | Symmetric (both hands mirror each other) | Most beginners, roughly ages 5-7 | Bow can look uneven until tension control develops |
| Circle method (around the tree) | 7 | Asymmetric with a steady-tension requirement | Older kids, roughly ages 7+, or kids who already failed another method | Hardest to learn from scratch; requires holding a loop while wrapping |
A few practical rules for choosing:
- Start with bunny ears for most beginners. It has the lowest coordination barrier because both hands perform the same motion at the same time.
- Pick the single loop if your child likes numbered steps and verbal cues. The six-step sequence maps cleanly to counting out loud, which some kids find reassuring.
- Try the circle method only after two weeks of consistent practice with another method. It suits kids who already have loop-holding strength but is a poor first method, stacking a tension requirement on top of a sequencing requirement.
- Match the method to handedness. If your child is left-handed, sit on their left side so they mirror your dominant hand. Mirroring the wrong hand adds a mental rotation step that slows learning.
What most guides miss: switching methods mid-learning resets progress, because each builds a different muscle-memory pattern. Pick one method and stick with it for at least two weeks.
Shoe Tying Practice Activities for Kids
Shoe tying practice activities for kids work best when they feel like play, not homework.
Try these:
- Practice on a robe belt or jump rope first. Bigger material means bigger motions and easier wins.
- Use a cardboard cutout shoe with real laces threaded through holes. Kids can practice anywhere.
- Race the clock gently. "Can you make the bow before I count to twenty?" adds fun without pressure.
- Teach a stuffed animal. Kids love playing teacher, and explaining the steps out loud reinforces learning.
Keep sessions short: ten minutes a day beats an hour once a week. End on a win, even if it's just a good starting knot.
Practicing Together With a Structured Plan
A simple two-week plan keeps momentum without overwhelm. Adjust the pace to your child.
| Week | Focus | Daily Time | Goal |
|---|---|---|---|
| Week 1 | Starting knot only | 5-10 min | Snug knot, every time |
| Week 2 | Loops and bow | 10 min | Complete bow with help |
| Week 3 | Full sequence solo | 10 min | One independent tie per day |
| Week 4 | Speed and consistency | 5 min | Ties shoes without reminders |
Sit beside your child every session, narrate what you're doing, and celebrate messy bows as loudly as neat ones.
Troubleshooting Common Mistakes and Adaptations
Even with a solid method, some kids hit roadblocks.
The bow keeps coming undone. The starting knot is probably too loose.
Loops collapse before the tuck. Small hands struggle to hold a loop and wrap at once.
The child grabs the wrong lace. This is the most common sequencing error.
Frustration boils over. Stop the session. Come back tomorrow.
One hand won't cooperate. Some kids have a weaker dominant hand.
Adaptations for Different Learning Needs
For children with fine motor challenges, developmental delays, or sensory sensitivities, demonstration-and-copy often isn't enough. Change the input channel rather than repeating the same instruction louder.
- Visual adaptations. Use two-tone laces so each end is a different color, and mark each lace's midpoint so the child can see when ends are even. A mirror lets them see their hands and the reflection, helping some kids map the motion.
- Tactile adaptations. Start with a robe belt or thick cord for bigger material and motions. A cardboard cutout shoe with real laces lets the child practice on a flat, stable surface. Some kids learn better from behind a parent guiding their hands than watching from the front.
- Verbal adaptations. Keep one script and say it the same way every time; changing wording forces the child to re-parse the instructions. A short rhyme or numbered count beats free-form narration for kids who rely on auditory sequencing.
- Motor-skill adaptations. Break the task into the smallest units and master each before chaining them. A child who can't hold a loop steady can practice just the pinch-and-hold for a week. Build hand strength separately with clay, sponges, or squeeze toys.
- Pacing adaptations. Short, frequent sessions beat long, rare ones, ten minutes a day, ending on a win. If progress stalls for months despite steady practice, a pediatrician or occupational therapist can rule out underlying motor issues. Many children simply need more time.
No Tie Shoelaces for Kids: A Practical Alternative
Sometimes the best way to teach kids to tie shoes is to take the pressure off entirely while they build the skill.
No tie shoelaces are elastic laces that stretch to let a foot slide in and hold the shoe snug without any tying. They turn regular sneakers into slip-ons.
Our uLace Kiddos line was built for exactly this moment. The uLace Kiddos - Canvas set costs $5.99 and comes in neutral tones that match most sneakers. The uLace Kiddos - Rainbow version adds color kids actually ask to wear.


Installation takes minutes with a simple push-and-pull method. No special tools.
Why use them during the learning window?
- Morning routines stop depending on tying speed
- Kids get independence now, not in six months
- Practice sessions stay low-pressure because there's no daily deadline
- No dangling laces dragging through mud or tripping anyone
One parent told us: "I love how easy these are. I can just slip on my shoes without damaging them at all." That's the point.
Conclusion
Teaching a child to tie shoes tests patience more than technique. The method matters less than the consistency you bring and the pressure you take off along the way.
If mornings have turned into a battle over laces, uLace offers a practical bridge.
TAKE THE QUIZ to find the right fit for your child's sneakers, and give everyone a calmer start to the day.
Frequently Asked Questions
At what age can children typically start learning to tie shoes?
Most kids show the hand control and patience for shoe tying between ages 5 and 7, though the range varies widely. Watch for readiness signs rather than a birthday: can your child pinch and release a lace, follow a three-step instruction, and sit focused for a few minutes? If those pieces are in place, start with short practice sessions. If not, keep building fine motor skills through play and revisit in a few weeks.
Which shoe-tying method is easiest for kids?
The bunny ear method is usually easiest for beginners because both loops stay visible and the final step is a simple push-through. The standard loop-and-swing method is faster once mastered but harder to learn first. Try bunny ears for a week or two, then introduce the faster method if your child is ready. Some kids stick with bunny ears for years and that is fine. The goal is independence, not a particular technique.
How can I help a child who struggles with fine motor skills learn to tie shoes?
Break the process into smaller pieces and practice each one alone before chaining them together. Use thick laces in two colors so the ends are easy to tell apart, and practice on a shoe placed on the table rather than on a foot. If tying stays frustrating, no tie shoelaces for kids are a practical bridge: uLace Kiddos sets at $5.99 turn sneakers into slip-ons while your child keeps building hand strength through other activities.
What are fun ways to practice tying shoes?
Move practice off the foot and onto the table using a cardboard shoe outline or a robe belt, which is bigger and easier to grip. Add rhymes or visual cues for each step, race a timer, or let your child tie a doll's shoes. Keep sessions to 5 or 10 minutes and celebrate small wins. Practicing together, with you doing the steps side by side, keeps it playful instead of a chore.