


U-Lace Lacing Guide & Instructions
Lacing Guide
U-Lace No-Tie Laces are all about Fit, Function, Style and Self-Expression. There are dozens of ways you can lace U-Laces into your sneakers to make them totally yours. For ideas on how to lace up with U-Lace no-tie laces, see the lacing guide below and check back for new entries on a regular basis.
How to Lace No Tie Laces
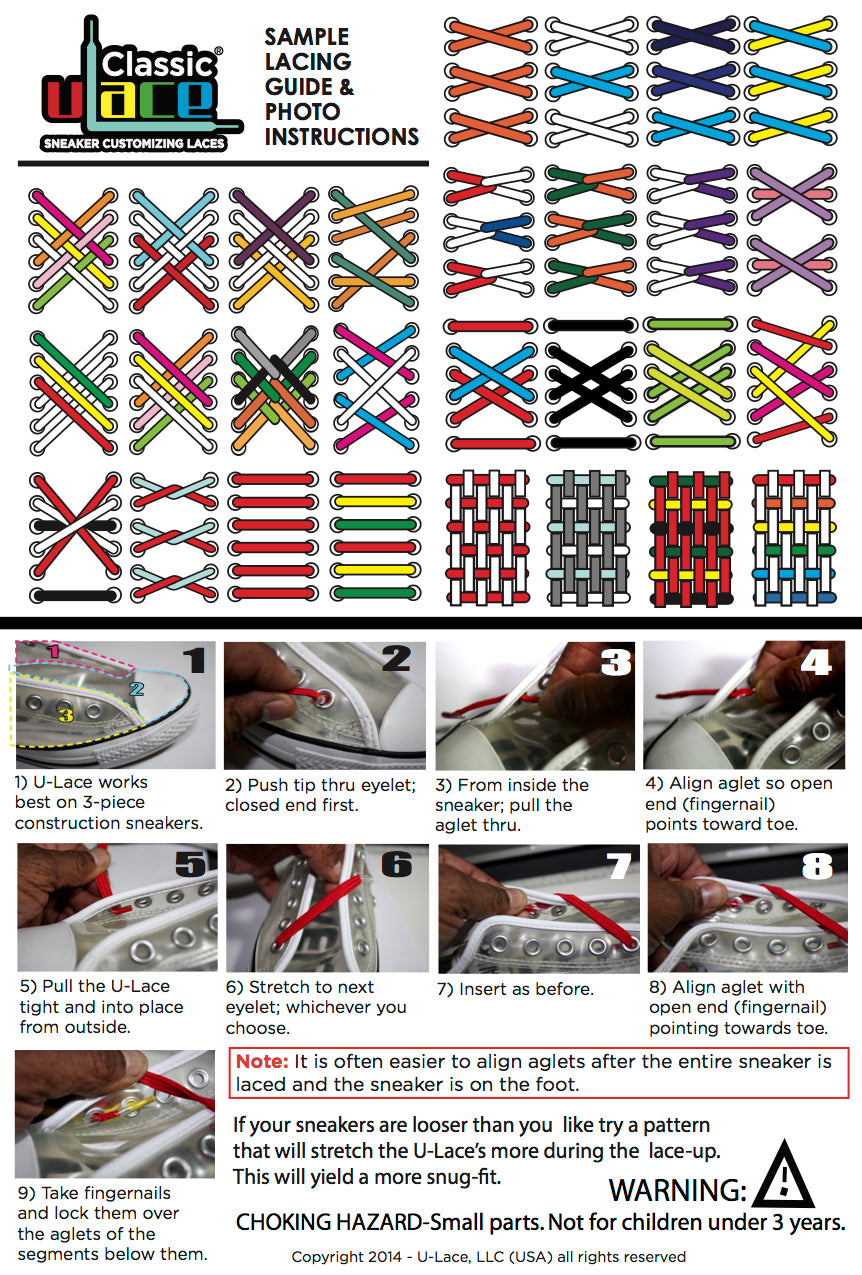
- U-Lace works best on 3-piece construction sneakers (such as Puma’s, Adidas, Vans Sky-Hi, Converse Chuck Taylors, and many others).
- Push tip of the U-Lace through eyelet; closed end first.
- From inside the sneaker; pull the aglet through.
- Align aglet so open end (fingernail) points toward toe.
- Pull the U-Lace tight and into place from outside.
- Stretch to next eyelet; whichever you choose.
- Insert as before.
- Align Aglet with open end (fingernail) pointing toward toe.
- Take fingernails and lock them over the aglets of the segments below them.
Note: it is often easier to align aglets after the entire sneaker is laced and the sneaker is on the foot.
If your sneakers are looser than you like, try a pattern that will stretch the U-Laces more during the lace-up. This will yield a more snug fit.