




Custom Sneaker Lacing Style Guide: 6 Patterns to Try
Table of Contents
- Why Lacing Style Matters for Fit and Comfort
- How to Lace Sneakers for a Slip-On Fit
- 6 Creative Sneaker Lacing Patterns to Try
- Making the Switch to No-Tie Elastic Shoelaces
- Choosing the Right Lace Length and Material
- Common Lacing Mistakes and How to Avoid Them
- Conclusion: Find Your Perfect Lacing Style
- Frequently Asked Questions
Last Updated: September 6, 2026
Why Lacing Style Matters for Fit and Comfort
Most people lace their sneakers the same way they did in grade school, never stopping to consider that the pattern threading through those eyelets changes how the shoe performs. The truth is that a custom sneaker lacing style guide matters because the way you lace directly controls pressure points, heel slip, and overall foot fatigue. A standard criss-cross can pinch a high instep, while a straight bar pattern relieves that pressure and creates a cleaner fit across the top of your foot (peer-reviewed research).
Your lacing choices also serve a functional purpose beyond aesthetics. Adjusting the tension at specific eyelets can lock your heel in place during a run or give your toes extra breathing room at the front of the shoe. The single biggest shift we see is moving from a one-size-fits-all lacing approach to a pattern tailored to individual foot anatomy.
The right pattern can even reduce the wear and tear on your sneakers. Forcing your foot into a tightly laced shoe stretches the upper and breaks down the heel counter over time. Learning a few simple lace techniques gives you control over your fit without buying a new pair of shoes. Below, we will show you exactly how to match a pattern to your needs, starting with the slip-on fit that so many people chase.
How to Lace Sneakers for a Slip-On Fit
A slip-on fit is the most requested adjustment we hear about, and it is simpler to achieve than you might think. The goal is to loosen the lacing system enough that your foot slides in without untying, while still holding your heel securely when you walk. This requires leaving the top one or two eyelets completely unlaced, which removes the pressure point across your instep.
Start by loosening the laces entirely and slipping your foot into the shoe. Lace them back up snugly but not tight, then tie a standard knot. When you want to remove the shoe, do not untie the knot; instead, use a shoehorn or press your heel down and slide your foot out. Over time, the laces will maintain their shape, and the shoe will stretch slightly to accommodate your foot.
For a true hands-free experience, many people switch to no-tie elastic shoelaces. These stretch as you insert your foot and return to a snug resting position, so you never touch the knot again. This approach is particularly helpful for anyone who struggles to bend over, and it keeps the sneaker looking neat with a consistent tension every single time.

6 Creative Sneaker Lacing Patterns to Try
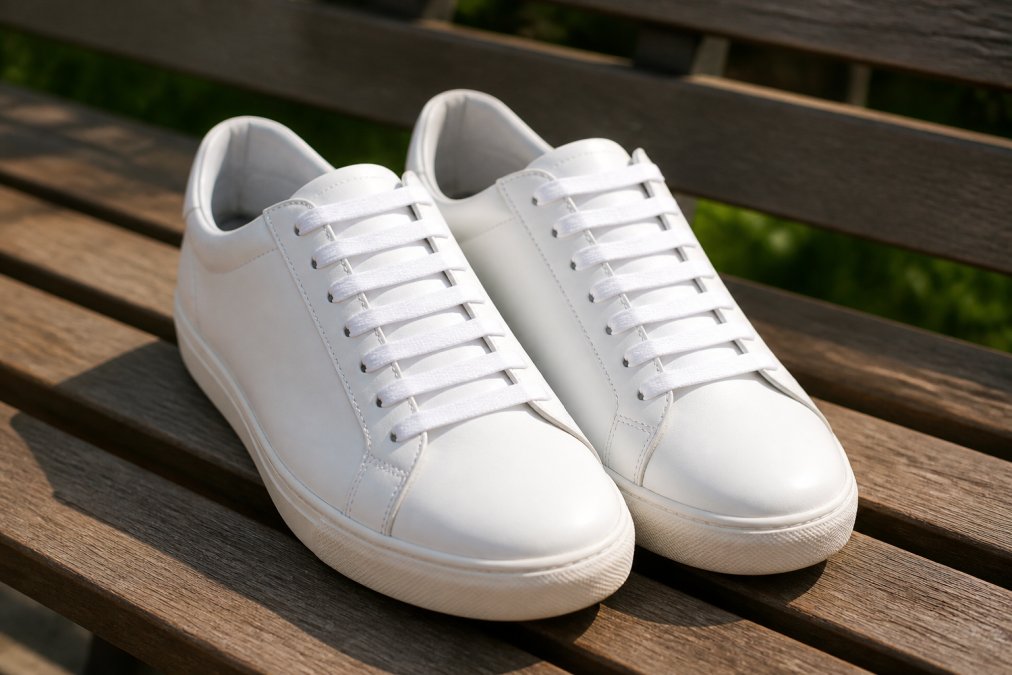
A custom sneaker lacing style guide is not just about fixing a bad fit; it is also a chance to express personality. The six patterns below range from subtle to bold, and each one changes both the look and the feel of your shoe. Try them with different colored laces to see how the same pattern can look completely different.
1. Criss-Cross Lacing
The criss-cross is the default pattern that comes with most sneakers, and it is the easiest to adjust. Start by threading the lace through the bottom pair of eyelets so both ends are equal. Cross each end over and push it up through the next eyelet, repeating until you reach the top.
This pattern provides even tension across the whole foot, making it a solid choice for everyday wear. It is also the fastest to lace, taking less than a minute once you have the rhythm. The downside is that it can create a pressure point on the top of a high-arched foot, which is why some people prefer the straight bar variation.
2. Straight Bar Lacing
Straight bar lacing gives sneakers that clean, uniform look popular on dress shoes and premium casual footwear. Instead of crossing over, each lace travels straight up its own side of the shoe, creating horizontal bars across the eyelets. This pattern reduces pressure on the instep and looks sharp under slim-fit jeans.
To achieve this look, feed the lace through the bottom eyelets from the outside in. Run the right lace straight up the right side, threading it through each eyelet from underneath. The left lace does the same on the left side, and you hide the crossover point on the underside of the shoe. This is our top pick for a tidy, professional aesthetic that still allows full adjustment.
3. Heel Lock Lacing
Heel lock lacing, sometimes called a runner's loop, solves the problem of your foot sliding forward inside the shoe. This pattern is essential for anyone who experiences heel blisters or feels their toes jamming during downhill walks or runs. It works by creating an extra loop at the top eyelets that cinches your ankle securely.
Lace your shoes normally using a criss-cross pattern up to the second-to-last eyelet. Instead of threading through the top eyelet, pull each lace straight up and through the loop on the same side, creating a small loop on each side. Cross the laces and thread them through these loops, then pull tight. The result is a locked heel that does not move.
4. Diagonal Lacing
Diagonal lacing is a flashier option that draws attention to your feet and creates a unique visual line. This pattern is less about function and more about making a statement, though it can relieve pressure for wide feet by changing the angle of pull across the eyelets. It works best on sneakers with an odd number of eyelet pairs.
Begin at the bottom and run one lace straight up the side before crossing it over to the opposite eyelet two rows up. The other lace mirrors this movement, creating a series of parallel diagonal lines. This pattern takes practice, but the finished look is unmistakably custom and turns your sneakers into a conversation piece.
5. Military Lacing
Military lacing, also known as ladder lacing, is a highly functional pattern that distributes tension evenly and prevents the laces from snagging on gear. The horizontal bars sit flush against the tongue, which keeps the laces out of the way during activity. This is a favorite among hikers and anyone who wants a rugged, utilitarian look. styling luxury tracksuits.
To create this pattern, thread the lace through the bottom eyelets and pull both ends out. Run each end straight up to the next eyelet, then cross them through the horizontal bar you just created before continuing upward. This creates a ladder effect that is both secure and visually distinct from the standard criss-cross.
6. One-Handed Lacing
One-handed lacing is a specialized technique designed for individuals with limited dexterity or use of only one hand. The pattern uses a single continuous lace that runs through all eyelets without requiring a traditional knot. You finish by pulling a single loop tight, which locks the entire system in place.
This pattern is a game-changer for accessibility. It allows people with arthritis or fine motor challenges to secure their own shoes without assistance. If you find even this method difficult, no-tie elastic shoelaces offer an even simpler solution by removing the need to tie altogether.
Making the Switch to No-Tie Elastic Shoelaces
If you love the idea of a slip-on fit but want to skip the daily lacing routine entirely, no-tie elastic shoelaces are the answer. These laces replace your traditional flat laces with a stretchy cord that you install once and leave in place. Your sneaker then behaves like a slip-on, stretching open as you insert your foot and springing back to a secure fit.
The installation takes about two minutes per shoe using a simple push and pull method. You thread the elastic lace through the eyelets just like a normal lace, then secure the aglet inside the shoe. The elastic tension does the rest, holding your foot firmly without the need for a bow.
This upgrade is particularly valuable for parents with young children, seniors who struggle to bend over, and athletes who want a consistent fit during activity. The laces stay tied, so there are no dangling ends to trip on or dirty strings dragging through puddles. You get the convenience of a slip-on with the security of a laced shoe.
Choosing the Right Lace Length and Material
Selecting the correct lace length prevents frustration and keeps your sneakers looking balanced. A lace that is too short will not reach the top eyelets, while an overly long lace creates bulky loops that are hard to manage. Count your eyelet pairs and measure your original laces to find the right match.
Shoe manufacturers typically include laces that are long enough for a standard criss-cross pattern. If you plan to use a straight bar or military pattern, you may need a longer lace because these styles consume more length. When in doubt, measure the old lace before removing it and compare it to the sizing chart on your new laces.
Material matters just as much as length. Traditional cotton laces stretch and fray over time, while polyester and nylon options resist moisture and hold their shape (ncsu.edu). Elastic laces offer a different advantage: they provide consistent tension and never come untied. For most people, a durable synthetic material with a little give is the best balance of comfort and longevity.
Common Lacing Mistakes and How to Avoid Them
The most common mistake we see is lacing too tightly across the instep, which restricts blood flow and causes foot pain (the CDC). Your laces should hold your foot securely without leaving deep indentations on the top of your shoe. If you feel pressure when you flex your foot, loosen the lower eyelets and rely on the top ones for security.
Another frequent error is ignoring the width of your foot. People with wide feet often benefit from skipping an eyelet or two in the middle of the shoe to create extra volume. Conversely, narrow feet may need a heel lock pattern to prevent the foot from sliding forward. The table below summarizes the main issues and their fixes.
| Lacing Mistake | Common Symptom | Best Fix |
|---|---|---|
| Over-tightening instep | Foot pain, numbness | Loosen lower eyelets |
| Ignoring foot width | Pinching or sliding | Skip middle eyelets |
| Wrong lace length | Bulky knots, loose fit | Measure and match |
| Skipping heel lock | Heel blisters, toe jam | Use runner's loop |
| Tying too loose | Dangling laces, trips | Switch to elastic laces |
Finally, do not overlook the condition of your laces. Frayed or stretched laces compromise the fit of your entire shoe and should be replaced at the first sign of wear. A clean, well-maintained lace not only looks better but also holds its tension more reliably throughout the day.
Conclusion: Find Your Perfect Lacing Style
Finding the right lacing pattern is a small change that transforms how your sneakers feel and look. Whether you need a heel lock for running, a straight bar for style, or a fully hands-free setup for convenience, the options above give you control over your footwear. Start with the pattern that solves your biggest complaint, then experiment with the others to see what suits your daily routine.
If you want to skip the tying step altogether, uLace offers a full range of no-tie elastic shoelaces that work with any sneaker. Our laces install in minutes, keep your shoes looking neat and tidy, and provide a secure, stretchy fit that lasts all day. Take the quiz on our site to find the perfect style and color for your pair, and buy the sneakers you love without the hassle of traditional laces.
Frequently Asked Questions
What is the best lacing style for sneakers?
The best style depends on your goal. For everyday comfort and a classic look, criss-cross lacing works well. If you have a high instep or narrow heel, heel lock lacing gives extra stability. For a clean, formal aesthetic, straight bar lacing is a top choice. For a truly customized fit that stays secure all day, many sneaker fans switch to no-tie elastic shoelaces, which remove the need for a knot altogether.
How can I make my sneakers slip-on using custom lacing?
To create a slip-on fit, you need laces that stretch. Replace your standard laces with elastic no-tie options. Thread them through each eyelet normally, but leave the tension relaxed enough to slide your foot in. The elastic material stretches when you push your foot down, then returns to a snug fit around your ankle. This method eliminates the need to tie and untie, making it easy to step in and go.
What are some creative or decorative shoe lacing techniques?
Beyond the basic criss-cross, popular creative patterns include straight bar lacing for a minimal look, diagonal lacing for a bold visual, and military lacing, which tucks the lace ends inside the shoe for a clean finish. You can also try checkerboard lacing for a statement. The pattern you choose changes both the style and the pressure points on your foot, so pick one that matches your aesthetic and comfort needs.
Will elastic laces stay secure during sports or running?
Yes, high-quality elastic laces are designed to hold securely. The key is choosing a performance-oriented pair, like uLace ProFormance, which uses a stronger cord for higher activity levels. The elastic tension keeps the laces snug against your foot without the risk of a knot coming undone. This provides a locked-in feel that supports quick movements, making them a reliable choice for active use.