




How to Install No Tie Laces: Step-by-Step Guide
Table of Contents
- What You'll Need Before You Install No Tie Laces
- How to Thread Elastic Laces Through Your Eyelets
- Fitting the Lock or Fastener and Securing the Lace Ends
- How to Cut Elastic Shoelaces Without Going Too Short
- How to Adjust No-Tie Laces for the Right Fit
- No-Tie Laces Installation Video: Watch It Once, Then Do It
- Troubleshooting No Tie Laces: Fixes by Symptom
- Conclusion
- Frequently Asked Questions
Last Updated: October 20, 2026
What You'll Need Before You Install No Tie Laces
Installing no tie laces takes about five minutes per shoe and needs no special tools. At uLace, we've been in business since 2009, and the process is simpler than most people expect.
Here's what to gather before you start:
- Your no-tie laces (elastic shoelaces with the fasteners included)
- The sneakers you plan to convert
- A pair of scissors
One quick note: elastic laces come in different lengths. Check the packaging so you grab the right size for your shoe. Too short and they won't thread.
Preparing the Shoes and Removing Existing Laces
Pull out the old laces completely. Start at the top eyelet and work your way down. If the old laces are knotted or frayed, cut them near the tip to make removal easier.
Wipe down the eyelets with a damp cloth. Dust and grit can make threading harder. Let the shoes dry fully before you continue.
How to Thread Elastic Laces Through Your Eyelets
Threading elastic laces is the same push-and-pull motion you use with regular laces, but the elastic changes two things: you need less tension than you think, and the lace length you need depends on the eyelet count and the pattern. Get those two variables right and the rest is mechanical.
Count your eyelets first
Count the eyelet pairs on one shoe before you thread anything. Most sneakers have five, six, or seven pairs. That number determines how much lace you actually use:
- Five pairs: a standard crisscross uses roughly 24 to 28 inches of lace per shoe on a low-profile sneaker.
- Six pairs: roughly 28 to 34 inches.
- Seven pairs: roughly 32 to 40 inches.
These are working ranges, not exact specs, shoe width, eyelet spacing, and lace thickness all shift the number. The practical rule most fitters use: thread first, then trim, and leave at least one inch of tail past the fastener. If your kit's lace is shorter than the range for your eyelet count, switch to a straighter pattern (below), which uses less length.
The standard crisscross, step by step
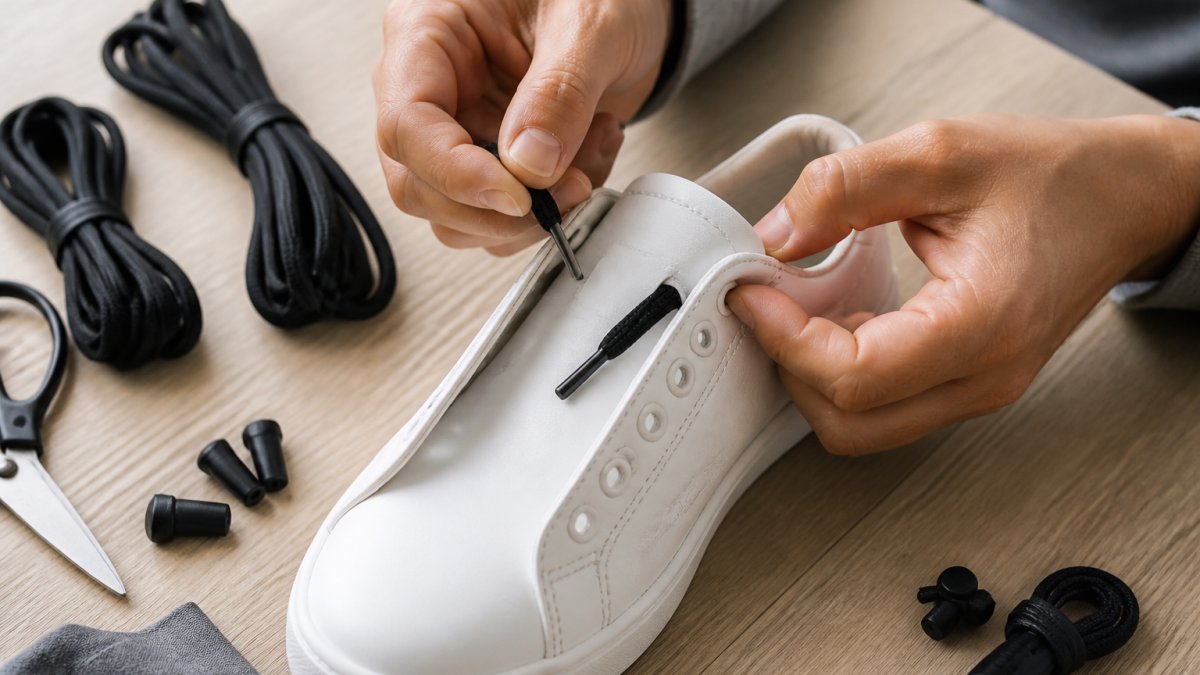
- Start at the bottom eyelet pair closest to the toe. Push one lace end up through the left eyelet from underneath.
- Pull that end across the tongue and down through the right eyelet of the next pair up.
- Repeat, alternating sides, until you reach the top pair.
- Keep the tension even as you go, elastic stretches, so snug is the target, not tight. You want enough slack that your foot slides in without a fight.
When to use a straight-bar pattern instead
A straight-bar pattern runs the lace horizontally across each eyelet pair and hides the cross on the underside. It uses less lace than a crisscross, often 10 to 15 percent less, which makes it a good choice when your kit's laces run short or your shoe has seven or more eyelet pairs.
Flat versus round elastic laces
Flat elastic laces sit flatter against the tongue and hold tension in a straight-bar pattern well; they can, however, twist in narrow eyelets. Round elastic laces thread more easily through tight eyelets and work better with locking mechanisms that clamp the lace, because the round profile seats more predictably inside the lock channel.
Threading around the tongue
On shoes with a gusseted or padded tongue, run the lace over the tongue rather than under it. Running it under can pinch the top of the foot once the elastic pulls taut.
Once both laces are threaded to the top pair, you're ready to fit the lock or fastener. Don't trim yet; trimming comes after a full try-on.
Fitting the Lock or Fastener and Securing the Lace Ends
Most installation guides assume you bought their kit and follow their steps. The problem is that no-tie fasteners come in several distinct designs, and the steps that work for one will damage or defeat another. This section walks through the common fastener types side by side so you can identify yours and follow the right sequence.
Identify your fastener type first
Look at the hardware in your kit and match it to one of these four designs:
- Spring-loaded barrel lock (cord lock): a small plastic or metal cylinder with a push-button or squeeze tab. The lace passes through the barrel, and the spring clamps it when you release the button.
- Cam or lever lock: a hinged lever that flips down to pinch the lace against a channel. Common on magnetic and quick-lock systems.
- Magnetic lock: two halves that snap together magnetically, with the lace captured between them. The magnet holds the closure; friction or a secondary clip holds the tension.
Spring-loaded barrel lock
- Thread both lace ends through the barrel from the same side, so they exit together.
- Slide the barrel down until it sits roughly half an inch above the top eyelet.
- Press the button and slide to adjust; release to lock.
- Tug each lace end gently to confirm the spring has seated.
A barrel lock that slides down on its own usually means the lace is too thin for the barrel's inner diameter. Doubling the lace back through the barrel once adds enough bulk to grip.
Cam or lever lock
- Open the lever fully before threading, threading through a closed cam is the most common installation mistake with this design.
- Pass both lace ends through the channel.
- Slide the lock to its resting position near the top eyelet.
- Close the lever firmly until it clicks or seats flush.
If the lever won't close flush, the lace is too thick for the channel. Don't force it; a partially closed cam will slip under load.
Magnetic lock
- Separate the two halves.
- Route each lace end through its half and tie a small stopper knot at the very end so the lace can't pull back through.
- Snap the halves together and slide the assembly to the top eyelet.
- Test the hold by pulling the lace ends apart, the magnet should hold the closure, and the stopper knots should stop the lace from escaping.
Magnetic locks trade holding force for convenience. On high-impact activity, check the hold before each use.
Clamp or crimp end
- Thread the lace to its final position and complete a full try-on first, crimped ends are effectively permanent.
- Slide the clamp onto the lace end.
- Crimp firmly with pliers until the clamp deforms and grips.
- Trim any lace tail past the clamp.
Because crimp ends can't be undone without cutting the lace, treat this as the last step, not the first.
Positioning the lock on the shoe
Regardless of type, position the lock so it rests flat against the tongue, roughly half an inch to one inch above the top eyelet. A lock that sits too high catches on pant legs and loosens; one that sits too low digs into the top of the foot. On shoes with a padded collar, seat the lock just above the padding line, not on it.
Securing lace ends against fraying
Elastic laces fray at cut ends faster than cotton laces because the elastic core pulls back from the sheath. Three workable methods:
- Melt the tip: hold the cut end near (not in) a flame for a second until the synthetic fibers fuse. Works on nylon and polyester elastics; skip it on cotton-blend laces.
- Knot the tip: tie a small overhand knot at the very end. Simple, reversible, and adds a stopper that keeps the lace from pulling back through a barrel lock.
- Use an aglet or end cap: slide a small metal or plastic cap over the tip and crimp. The most durable option, and the one that looks cleanest.
Some no-tie styles skip the separate lock entirely, the stretch in the lace does the work. If your kit has no hardware, the lace ends themselves are the fastener, and a stopper knot at each end is all the securing you need.
How to Cut Elastic Shoelaces Without Going Too Short
Trim only after a full try-on. This is the step where people rush and regret it.
Put the shoes on with the laces threaded and the lock in place.
Leave about one inch of extra lace past the lock. Cut straight across with sharp scissors.
Melt or knot the cut ends if your lace type calls for it.
How to Adjust No-Tie Laces for the Right Fit
Adjustment is a simple tug, not a retie. To tighten, pull the lace ends through the lock. To loosen, push the lock up and stretch the lace.
Fit checks to run through:
- Slide your foot in and out without using your hands
- Wiggle your toes; nothing should pinch
- Walk ten steps; the heel should stay put
If the shoe feels loose, tighten one notch at a time. Small changes make a big difference with elastic material.
No-Tie Laces Installation Video: Watch It Once, Then Do It
A short installation video is worth ten minutes of reading. Most brands post one on their product page, and watching it once makes the whole process click.
Here's how we'd use a video:
- Watch the full clip without touching your shoes
- Rewatch the threading section while holding a lace
- Pause at the fastener step and copy it exactly
The second shoe always goes faster. That's normal.
Troubleshooting No Tie Laces: Fixes by Symptom
| Symptom | Likely Cause | Fix |
|---|---|---|
| Shoe feels too tight | Lace tension too high | Loosen one eyelet at a time |
| Heel slips out | Lace too loose near the ankle | Tighten the top section |
| Lace ends fraying | Cut ends not sealed | Trim again and seal the tips |
| Lock slides down | Fastener not engaged | Re-thread and press until it clicks |
| Lace looks bunched | Uneven threading | Re-lace with even tension |
Laces that keep slipping usually need a fresh threading, not a new set. Take five minutes to redo it before you assume the laces are faulty.
Conclusion
Getting no tie laces right comes down to patience at two moments: threading and trimming. Rush either one and you'll be redoing the job.
That's exactly why we built uLace around a simple push-and-pull install. Our elastic laces come in styles like Classic, Slims, and ProFormance, so you can match any sneaker.

Ready to turn your favorite sneakers into slip-ons? Take the quiz and we'll help you find the right fit.
Frequently Asked Questions
Do you cut elastic laces after installing them?
Yes, most no-tie laces need trimming after installation, but trim only after you've tested the fit. Thread the laces, set your tension, put the shoes on and walk around for a minute. Once the fit feels right, snip the excess lace about 1 inch past the final eyelet or lock. Leaving that small tail gives you room to re-adjust later. Cut too short and the lace can slip back through the eyelet, forcing you to start over with a new set.
How tight should no-tie laces be?
Tight enough that your heel stays locked in when you walk, loose enough that you can slide your foot in without using your hands. A good test: put the shoe on, then try to lift your heel out. If it lifts more than a quarter inch, tighten the lace tension. If the shoe feels pinched across the top of your foot, loosen it. Elastic laces stretch as you move, so start slightly snugger than you think you need.
Can you install no-tie laces on any sneakers?
Most sneakers with standard eyelets work, including running shoes, canvas low-tops and everyday trainers. Shoe styles with very wide or unusually spaced eyelets may need a different lacing pattern to sit flat. If your shoes fit tightly already, elastic laces usually make them easier to get on, not harder, because the stretch gives your foot room to slide in. Check the lace length against your eyelet count before trimming anything.
How do you adjust no-tie laces if they feel too tight?
Loosen the lace at the eyelet closest to your ankle first, since that's where most of the pressure sits. Slide the lace through the eyelet to add slack, then re-test the fit. If your laces use a lock or clasp, release it, pull a little slack through, and re-secure. For a quick fix mid-day, work the lace back and forth through the top two eyelets with your thumb. Small changes of a half inch or so usually solve it.