




Easy Ways to Tie Shoes: Methods for Every Need
Table of Contents
- The Bunny Ears Method: The Easiest Way to Tie Shoes
- The Ian Knot: Tie Shoes in Under 2 Seconds
- Adaptive Tying for Limited Dexterity and Motor Challenges
- No-Tie Shoelaces for Sneakers: Skip the Knot Entirely
- How to Lace Sneakers for a Slip-On Fit
- Creative Shoelace Patterns to Customize Your Look
- Troubleshooting: Why Your Shoelaces Keep Coming Undone
- Conclusion
Last Updated: August 22, 2026
The Bunny Ears Method: The Easiest Way to Tie Shoes
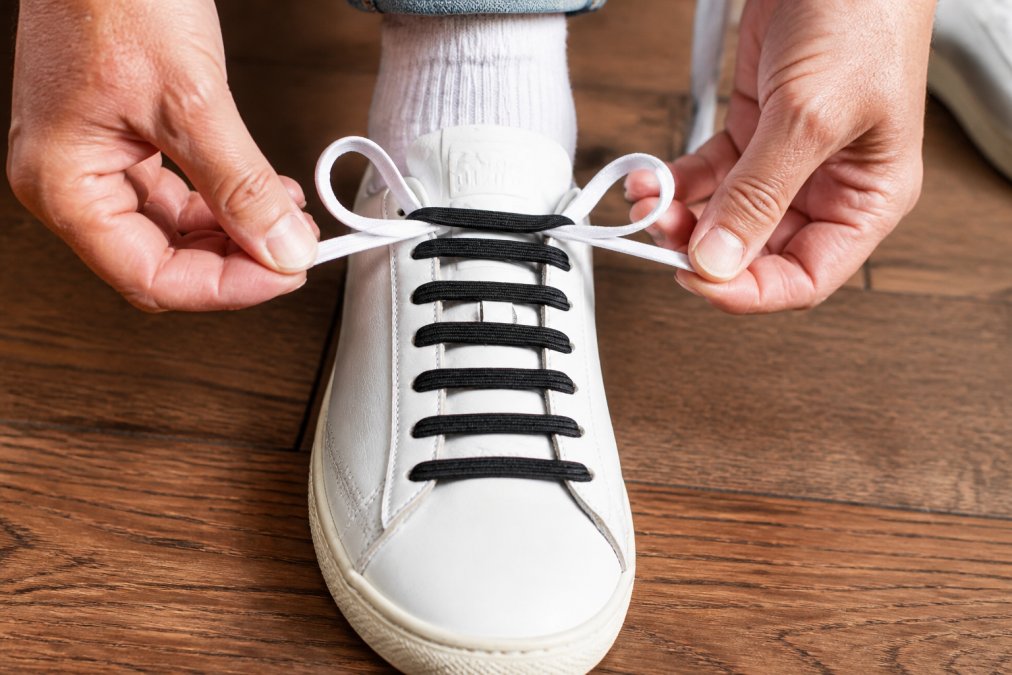
The bunny ears method is the simplest way to tie shoes for beginners and young children. Instead of creating one loop and wrapping the lace around it, you form two loops simultaneously and tie them together, a much more intuitive motion for small hands.
At uLace, we hear from parents constantly about morning routine struggles.
Step-by-Step Instructions
Start with a solid foundation knot. A loose foundation is the number one reason knots fail.
- Cross the right lace over the left and pull it underneath to create the foundation knot. Pull both ends firmly to tighten.
- Form a loop with the right lace, this is the first "bunny ear."
- Form a loop with the left lace, the second "bunny ear."
- Cross the right loop over the left loop.
- Tuck the right loop underneath and through the hole in the center.
- Pull both loops outward simultaneously and tighten.
The key to knot security is step 6: pull evenly on both loops at the same time. Pulling one side faster than the other creates an asymmetrical knot that loosens quickly.
Teaching Kids with the Bunny Ears Technique
Children's fine motor skills develop at different rates, so patience matters more than any specific trick. According to occupational therapy guidance from the American Occupational Therapy Association, most children develop the hand dexterity needed for shoelace tying between ages 5 and 7, though this varies widely.
A few things that actually help:
- Use thick, round laces on a practice shoe rather than flat, slippery ones.
- Sit behind the child and guide their hands through the motion so they experience the movement from their own perspective.
- Color-code the laces: one red end, one blue, to remove confusion about which loop crosses which.
- Practice on a shoe that's not on their foot first.
Once they've mastered bunny ears, the transition to the standard single-loop method is easy.
The Ian Knot: Tie Shoes in Under 2 Seconds
The Ian Knot, developed by Ian Fieggen, is genuinely the fastest way to tie shoes without sacrificing security. It creates the same finished bow as a standard knot but through a single simultaneous motion.
Step-by-Step Instructions
The Ian Knot feels awkward the first few times. The muscle memory takes about 20 minutes of practice to set.
- Complete your foundation knot as usual and pull it tight.
- Form a loop with the right lace in your right hand (loop facing left).
- Form a loop with the left lace in your left hand (loop facing right).
- Push the right loop through the left loop from the front, while simultaneously pushing the left loop through the right loop from the back.
- Pull both loops through and tighten.
Both loops pass through each other at the same time rather than sequentially. That's the entire speed advantage.
Why the Ian Knot Holds Better Than a Standard Bow
The Ian Knot produces a symmetrical bow that sits perpendicular to the shoe rather than running along its length. A symmetrical knot distributes tension evenly across both sides of the lacing, which means it loosens more slowly under the friction of walking and running.
For anyone dealing with knots that come undone mid-run, this is the fix. The technique is documented in detail at Ian Fieggen's comprehensive shoelace resource.
Adaptive Tying for Limited Dexterity and Motor Challenges
Standard shoelace tying requires coordinated use of both hands, reasonable grip strength, and the ability to bend forward comfortably. For people with arthritis, Parkinson's disease, post-stroke motor changes, or other conditions affecting dexterity, those requirements create a genuine daily barrier.
One-Handed Tying Technique
One-handed shoe tying is possible with a modified approach and setup.
- Secure the shoe on a non-slip surface so it doesn't move.
- Create the foundation knot using the thumb and forefinger of your dominant hand, stabilizing the lace end with your palm or a toe.
- Form a single loop with one lace end.
- Use your thumb to hold the loop against the shoe while you wrap the second lace around it.
- Hook the second lace through the loop using your forefinger and pull through.
Occupational therapists who specialize in adaptive daily living skills often teach variations of this approach, and adaptive equipment guidance from the National Multiple Sclerosis Society offers specific modifications for different grip challenges.
Tools and Modifications That Help
Several physical tools make tying easier or eliminate the need for it entirely:
- Lace locks and cord locks: Small plastic or metal clips that hold lace tension without a knot.
- Elastic no-tie laces: The most effective solution for most people. These replace standard laces entirely and convert any sneaker into a slip-on.
- Long-handled shoe horns: Eliminate the need to bend over.
- Velcro conversion kits: Available for some shoe styles, though they change the appearance significantly.
For anyone with arthritis in their hands, elastic no-tie laces offer real-world impact: the ability to slip shoes on and off without struggling with knots.
No-Tie Shoelaces for Sneakers: Skip the Knot Entirely
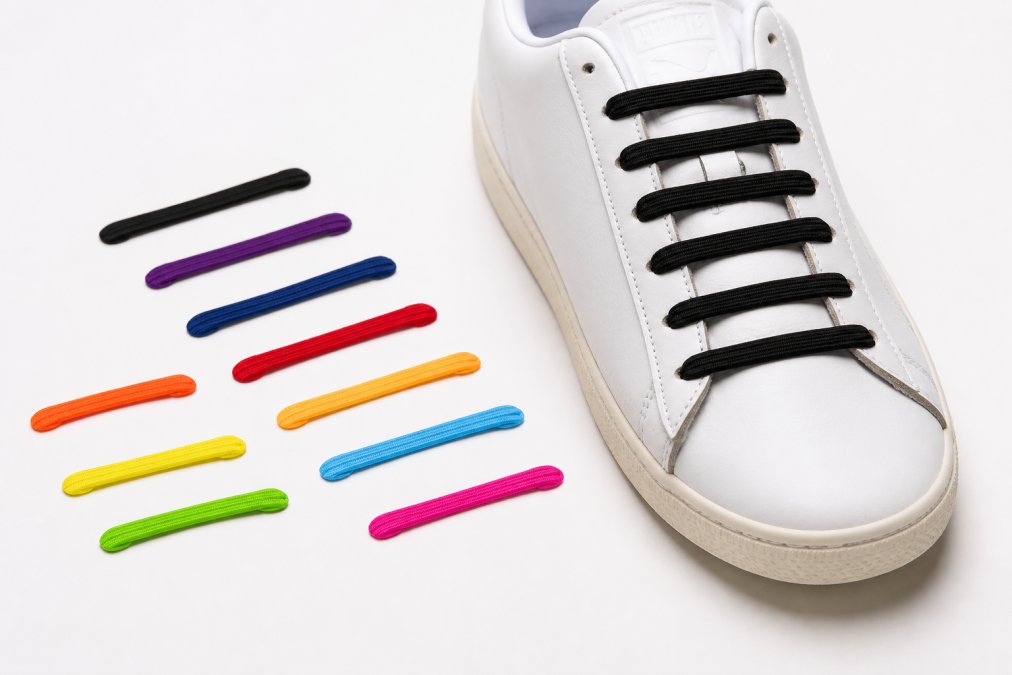
No-tie shoelaces for sneakers are elastic lace segments that replace traditional laces, converting any sneaker into a slip-on without altering its appearance. Each segment threads through a pair of eyelets and holds its position through tension.
How Elastic No-Tie Laces Work
Each lace segment is a short elastic loop with a small connector at each end. You push one connector through an eyelet from the outside, pull it through the inside, and secure it. Repeat across all eyelets. The elastic tension holds the shoe snug around the foot, and the stretch allows the foot to slide in and out without loosening. preventing shoe debris.
uLace has been making elastic no-tie laces since 2009, and the system works across virtually any sneaker with standard eyelets. The uLace Classic in Black ($6.49) is the entry point for casual and athletic sneakers. For wider shoes or higher-volume eyelets, the uLace Shorts ($12.99) offer a different fit profile.

What separates uLace from generic elastic lace options is the individual segment design. Because each segment is independent, you can replace a single piece if one wears out rather than replacing the entire lace.
Lace Material and Long-Term Durability
Lace material directly affects how long a no-tie system holds up. Quality elastic maintains consistent tension across hundreds of put-on and take-off cycles, while lower-quality materials lose their stretch over time.
Factors that affect durability:
- Elasticity retention: Quality elastic returns to its original length after stretching.
- Connector quality: Small clips or connectors need to grip without cracking.
- UV and moisture resistance: Laces exposed to outdoor conditions need to resist degradation.
For active use, running, sports, or daily wear, the uLace ProFormance ($14.99) is worth the upgrade.
How to Lace Sneakers for a Slip-On Fit
Converting a standard sneaker to a slip-on fit is straightforward with elastic laces. The goal is consistent tension across all eyelets so the shoe holds its shape and supports the foot evenly.
Installing uLace Elastic Laces: Step-by-Step
What you'll need: One pack of uLace laces (sized for your shoe's eyelet count), and about five minutes.
- Remove your existing laces completely.
- Take one uLace segment and push one connector end through the first eyelet from the outside of the shoe.
- Pull the connector through to the inside of the shoe until it clicks into position.
- Stretch the elastic segment across to the corresponding eyelet on the opposite side.
- Push the second connector through that eyelet from the outside and secure it.
- Repeat for each pair of eyelets, working from the toe up to the ankle.
- Once all segments are installed, put the shoe on and check the fit. The shoe should feel snug but not tight.
If one area feels tighter than others, the segment tension can be adjusted slightly by repositioning the connector within the eyelet.
For kids, the uLace Kiddos in Blue Teal ($5.99) are sized specifically for children's sneakers.
| uLace Option | Price | Best For |
|---|---|---|
| uLace Classic - Black | $6.49 | Everyday casual sneakers |
| uLace Kiddos - Blue Teal | $5.99 | Children's sneakers |
| uLace Shorts - Black | $12.99 | Wider shoes or high-volume eyelets |
| uLace ProFormance - Black | $14.99 | Sports and performance use |
Creative Shoelace Patterns to Customize Your Look
Lacing patterns do more than hold a shoe together; they change the entire visual profile of a sneaker. The right pattern can make a basic sneaker look intentional and styled.

Straight-Bar Lacing
Straight-bar lacing (also called display lacing) creates clean horizontal lines across the shoe rather than the traditional crossed pattern.
How to do it:
- Thread the lace straight across the bottom two eyelets (no cross).
- Feed both ends up through the next set of eyelets on the same side.
- Thread each end straight across to the opposite eyelet.
- Continue upward, feeding each end up one eyelet and then straight across.
The result is a series of parallel horizontal bars with no visible crossing on the top of the shoe.
Cross-Lacing and Display Lacing
Traditional cross-lacing creates the familiar X pattern across the shoe. Display lacing takes that further by creating deliberate patterns, diamonds, or checkerboards using two different colored laces.
For display lacing with two colors, alternate between two laces at specific eyelet intervals. According to sneaker customization resources from Sneaker News, creative lacing has become one of the most accessible ways to personalize footwear without permanent modification.
Troubleshooting: Why Your Shoelaces Keep Coming Undone
Shoelaces come undone for specific, fixable reasons. The most common is a granny knot, which looks like a standard bow but is actually less secure because the loops run parallel to the shoe rather than perpendicular to it.
How to tell if you're tying a granny knot: After tying, look at your bow. If the loops run along the length of the shoe (toe to heel), you have a granny knot. A secure bow sits perpendicular to the shoe (side to side).
The fix: Switch which lace you cross over during the final bow step. One combination produces a balanced knot; the other produces a granny knot.
Other common causes and fixes:
| Problem | Likely Cause | Fix |
|---|---|---|
| Knot loosens after 30 minutes | Granny knot | Switch crossing direction in final step |
| Knot comes undone immediately | Weak foundation knot | Tighten foundation before forming loops |
| Loops slip out | Slippery lace material | Use waxed laces or add a double knot |
| Knot sits sideways | Asymmetrical tension | Pull both loops simultaneously when tightening |
| Lace breaks at the knot | Friction damage at eyelet | Replace laces; check for sharp eyelet edges |
Lace material plays a larger role than most people expect. Flat synthetic laces are most prone to slipping because they have less surface texture than round cotton or waxed laces. If you're dealing with persistent knot failure on a specific pair of shoes, the lace itself may be the problem.
For anyone who has simply had enough of the troubleshooting cycle, converting to elastic no-tie laces removes the problem entirely. No knot means no knot failure.
Keeping your shoelaces tied shouldn't require this much effort. If you've worked through every technique and still find yourself stopping mid-walk to retie, traditional laces may not be the right solution for your shoes, your routine, or your needs. uLace elastic no-tie laces convert any sneaker into a slip-on in minutes, eliminate the daily frustration of tying and retying, and keep your sneakers looking clean without dangling laces. Take the quiz on the uLace website to find the right lace style and color for your specific sneakers and get started today.
Frequently Asked Questions
Q: What is the easiest way to teach a child to tie their shoes?
A: The bunny ears method works best for most children because it breaks the process into two simple loops rather than one complex wrap-and-pull sequence. Have your child practice on a shoe laid flat on a table before trying on a foot. Use laces in two contrasting colors to make each step visually distinct. If fine motor skills are a challenge, elastic no-tie laces remove the need to tie altogether.
Q: Are there ways to tie shoes without tying knots?
A: Yes. Elastic no-tie shoelaces for sneakers replace standard laces entirely. Each lace segment clips into the eyelets individually, creating a secure, stretchy fit that holds all day without any knot. uLace elastic laces start at $5.99 and install in minutes using a simple push-and-pull method through each eyelet. They work across most sneaker styles and are especially useful for seniors, children, or anyone with arthritis or limited dexterity who finds traditional tying difficult.
Q: How do I keep my shoelaces from coming untied?
A: Most laces come undone because the finishing bow is tied in the wrong direction, creating a weaker knot that loosens under friction. Tying a double knot adds a second layer of security. The Ian Knot technique produces a symmetrical, balanced knot that resists loosening better than a standard bow. Lace material also matters: flat woven laces grip better through eyelets than round nylon laces. If laces still slip, switching to elastic no-tie laces eliminates the problem entirely since there is no knot to come undone.
Q: How can I make my sneakers slip-on without losing style?
A: Installing elastic no-tie laces through your existing eyelets keeps the visual look of laced sneakers while converting them to a slip-on fit. uLace offers dozens of colors and two styles, Classic and ProFormance, so the laces match or complement your sneaker's design. The stretchy segments sit flat across the shoe just like standard lacing, keeping your sneakers looking neat and tidy. You can also try creative shoelace patterns like straight-bar lacing for a cleaner, more streamlined appearance before making the switch.
This article was written using GrandRanker