




Prevent Shoe Damage From Tight Laces: A 2026 Guide
Table of Contents
- How Tight Laces Damage Your Shoes and Feet
- How to Stop Eyelet Tearing Before It Starts
- How to Tie Shoe Laces Without Over-Tightening
- Benefits of Elastic No-Tie Laces for Shoe Longevity
- Signs You're Lacing Too Tight and How to Fix It
- Material-Specific Lacing: Leather, Mesh, and Knit
- Frequently Asked Questions
Last Updated: September 16, 2026
How Tight Laces Damage Your Shoes and Feet
The shoes you love break down every time you yank the laces tight. Tight laces concentrate force on a handful of square centimeters, and that force goes into the eyelets, the upper, and your foot.
Why Eyelets Tear and Collapse
Eyelets fail for mechanical reasons, not bad luck. Every time you pull a lace tight, the top two or three eyelets carry most of the tension, hundreds of times a week. Over months the material fatigues: leather stretches, mesh delaminates, knit loses its recovery. Higher tension means faster crack growth at the eyelet edge.
How to Stop Eyelet Tearing Before It Starts
Prevention comes down to lowering peak tension and spreading it across more of the shoe. You don't need new shoes. You need a different lacing approach.
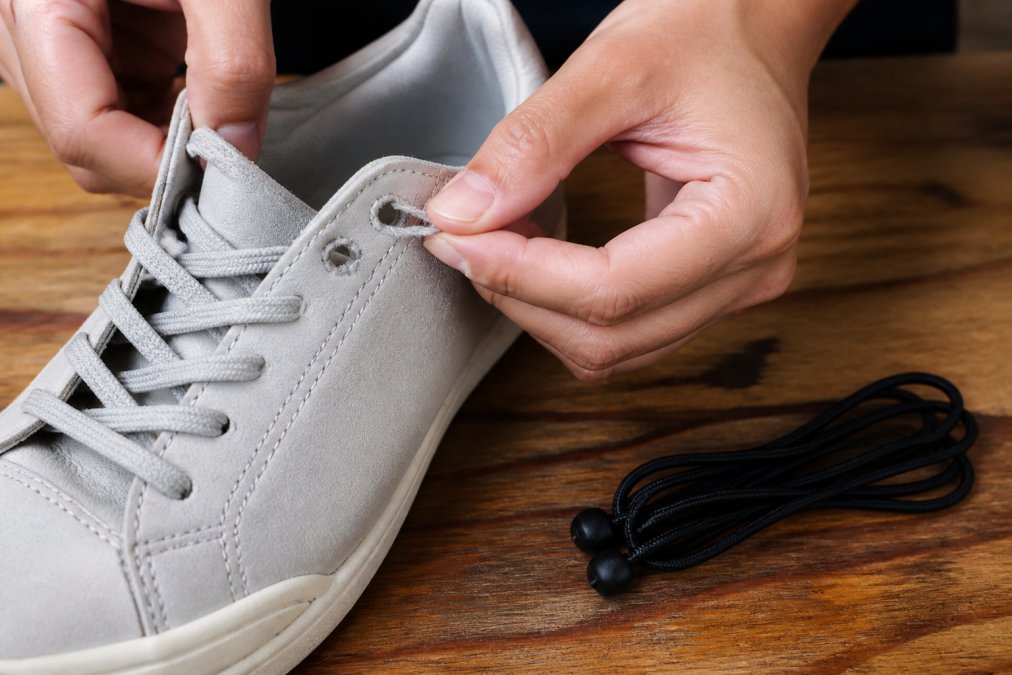
A few practical moves:
- Loosen the top two rows every time you put the shoe on.
- Use parallel lacing on high-wear shoes to halve the load on the top eyelets.
- Check eyelet reinforcement for fraying every few months.
- Rotate between two pairs so each shoe gets recovery time.
- Switch to elastic no-tie laces so the shoe flexes without you re-tensioning it.
How to Tie Shoe Laces Without Over-Tightening
The goal when you tie a shoe is a secure fit with even tension, not maximum tightness. Most people overtighten by pulling the ends hard and knotting them, locking in peak tension at the top eyelets and instep. A better sequence:
- Pull the laces snug from the bottom up, tightening each section as you go.
- Stop when the shoe feels secure, not when it feels tight.
- Cross the ends and pull gently, just enough to take up slack.
- Tie a standard bow and tuck the loops.
The Runner's Knot and Heel Lock
The runner's knot, also called a lace lock or heel lock, adds a loop between the top two eyelets so the lace grips without being pulled tight. It solves heel slippage, the real reason most runners overtighten. When your heel lifts, you instinctively crank the laces down; the heel lock holds the heel at normal tension, so you stop over-tightening.
Here is the full sequence, eyelet by eyelet:
- Lace the shoe normally from the bottom up, but stop at the second-to-top eyelet. Leave the top eyelet empty on both sides.
- Take the lace end on the left and run it straight up the outside of the shoe into the top-left eyelet, entering from the outside so it comes out on the inside. Do not cross it over.
- Repeat on the right side: run the right lace end up the outside into the top-right eyelet, entering from the outside.
- You now have two small loops, one on each side, formed by the lace running from the second-to-top eyelet to the top eyelet.
- Cross the two lace ends over each other as normal, then pass each end under and through the loop on the opposite side.
- Pull both ends to cinch. The loops close around the crossed laces and lock the heel down.
A few practical notes:
- The runner's knot works best on shoes with at least six eyelet rows. On a five-eyelet casual sneaker, the loops sit too close to the toe box to grip well.
- It adds roughly 1 to 2 inches of lace length to the bow, so short laces may not leave enough tail to tie.
- On leather uppers, the extra loop can crease the tongue; on mesh and knit, it sits flat and is barely noticeable.
- If you have a narrow heel and a wide forefoot, the heel lock is the single best fix: it lets you keep the forefoot loose while locking the heel, the opposite of a hard crisscross pull.
Benefits of Elastic No-Tie Laces for Shoe Longevity
Elastic no-tie laces replace fixed tension with stretch, and that single change protects the shoe. An elastic lace gives and recovers with every step, so the eyelets never see a hard spike in load.
| Lacing Approach | Effect on Eyelets | Effect on Feet | Best For |
|---|---|---|---|
| Standard crisscross, tight | High peak load, fast fatigue | Nerve compression, midfoot pressure | Nothing, honestly |
| Parallel lacing | Spread load, slower wear | Even pressure, less pinching | High-wear daily shoes |
| Runner's knot / heel lock | Moderate load, locked heel | Prevents heel slippage | Running, narrow heels |
| Elastic no-tie laces | Low, consistent load | Secure fit, no compression | Anyone wanting slip-on ease |
Signs You're Lacing Too Tight and How to Fix It
Your feet and shoes give clear warnings before real damage sets in. Read them as a pair: foot symptoms mean tension is too high right now, shoe symptoms mean it's been too high for too long. Most guides only cover the foot side, the shoe side is where permanent damage shows up.
Foot-side warning signs
- Red marks or indentations across the top of your foot after removing shoes
- Numbness, tingling, or a "pins and needles" feeling in the toes
- Heel slippage even when laces are tight, a sign you're compensating
- Pain on the top of the foot that fades within minutes of removing shoes
- A hot spot or burning sensation along the instep during the first mile
- Toes that feel cramped even though the toe box has room
Shoe-side warning signs
- Visible fraying or cracking around the top eyelets
- The eyelet ring itself loosening or rotating in its hole
- The upper bulging outward at the lacing row when the shoe is on
- A permanent crease or dent in the tongue where the knot sits
- Delamination of mesh layers around the top two eyelets
- Stretched-out or distorted collar on knit uppers
- Lace ends that have flattened or frayed from repeated hard pulling
If two or more foot signs appear together, you're over-lacing right now. If any shoe sign appears, damage has started, stop it from spreading.
Symptom-to-solution map
| What you're seeing | What it means | What to change |
|---|---|---|
| Pain on top of foot, fades after removal | Peak tension at the instep | Switch to parallel lacing; loosen the middle rows |
| Numbness or tingling in toes | Nerve compression at the top eyelets | Drop overall tension; add a heel lock so you don't need a hard pull |
| Heel slipping even when tight | You're compensating with lace tension | Tie a runner's knot; keep forefoot tension moderate |
| Fraying around top eyelets | Material fatigue from repeated peak load | Stop forcing your foot in; switch to elastic laces |
| Eyelet ring loose or rotating | Reinforcement has cracked | Retire the shoe for high-impact use; elastic laces can extend casual wear |
| Mesh delaminating at eyelet row | Repeated sharp tension spikes | Parallel lacing plus elastic laces to remove the spikes |
| Knit collar stretched out of shape | Sustained over-tension at the top | Lower tension; parallel lacing to spread load |
| Tongue creased or dented | Knot pressure point | Move the knot or switch to a no-tie system |
Change how tension moves through the shoe:
- Parallel lacing distributes load along the whole row instead of concentrating it at the top two eyelets.
- A heel lock stops the slippage that makes you over-tighten in the first place.
- Elastic no-tie laces hold consistent, moderate tension so the shoe never sees a hard spike, and you never re-crank after your foot swells.
For anyone with limited hand strength, elastic laces also remove the bending and pulling entirely, many customers over 70 simply slip their foot in now.
Material-Specific Lacing: Leather, Mesh, and Knit
Different upper materials fail differently, so the right lacing pattern changes with the shoe, the part most guides skip.
- Leather: Leather stretches and holds a crease, so high tension permanently deforms the eyelet area. Use parallel lacing and keep tension low; with less give, elastic laces pay off here more than anywhere.
- Mesh: Mesh delaminates around eyelets under repeated load. Avoid sharp, repeated tightening; a heel lock keeps the fit secure without stressing the mesh row.
- Knit: Knit uppers recover well but can stretch out of shape at the top eyelets. Distribute tension with parallel lacing and avoid over-tightening, which permanently distorts the collar.
Frequently Asked Questions
Can tight shoe laces cause foot pain?
Yes. Tight laces compress the top of your foot, causing dorsal foot pain, numbness, or tingling. They also restrict range of motion. Loosening the midfoot section or switching to elastic no-tie laces distributes tension more evenly and reduces pressure points without sacrificing a secure fit.
How do you know if your shoes are laced too tightly?
Watch for red marks on the top of your foot, numbness in your toes, heel slippage that forces you to re-tie constantly, or visible stretching around the eyelets. If you have to force your foot in without untying, your laces are too tight. Elastic no-tie laces from uLace let you slip shoes on without that forcing motion, which protects both your feet and the shoe.
Can tight laces cause permanent damage to shoe eyelets?
Repeated over-tightening stretches and fatigues the eyelet material. Metal eyelets can pull free from the upper, and fabric eyelets can tear entirely. Once an eyelet rips, repair is difficult. Preventing eyelet tearing starts with proper tension control and using laces that flex with your foot instead of fighting it.
What are the benefits of elastic no-tie laces for preventing shoe damage?
Elastic no-tie laces like uLace ProFormance ($14.99) maintain gentle, consistent tension instead of the sharp pull of traditional laces. That reduces stress on eyelets, prevents material fatigue, and eliminates the daily habit of forcing your foot in. You get a secure fit, easier slip-on convenience, and less wear on the shoe's upper over time.