




How to Paint Custom Designs on Shoelaces
Last Updated: November 1, 2026
Quick Summary
To learn how to paint custom designs on shoelaces, prep cotton or canvas laces by washing and drying them flat, then clip them taut on a jig. Thin acrylic paint with water and fabric medium, apply thin coats, dry between layers, and seal after 24 hours.
- Wash new laces in warm water with mild soap to remove sizing and factory oils.
- Thin acrylic with warm water and a drop of fabric medium until it flows like cream.
- Mark a tape ruler every 1/2 inch for dots and every 1 inch for stripes.
- Wait a full 24 hours before sealing so trapped solvent doesn't create a gummy finish.
- Use fabric paint only on elastic no-tie laces and avoid the stretch zone near eyelets.
Table of Contents
- What You'll Need Before You Paint Shoelaces
- The Best Paint for Fabric Shoelaces: Acrylic vs Fabric Paint
- Prepping and Tensioning Laces for Clean, Repeatable Patterns
- Step-by-Step: Painting Custom Designs on Shoelaces
- Design Techniques: Geometric, Tribal, and Repeat Patterns
- How to Seal Painted Shoelaces and Keep Them Flexible
- Painting Elastic No-Tie Laces Without Cracking the Coating
- Choosing Your Laces: Paint-Ready Cotton or No-Tie Elastic
- Frequently Asked Questions
What You'll Need Before You Paint Shoelaces
Learning how to paint custom designs on shoelaces starts with a simple truth: prep matters more than brushwork.
Here's your short supply list:
- Cotton or canvas laces (they soak up paint; slick synthetics fight back)
- Acrylic fabric paint or fabric medium
- Small cups of warm water for thinning
Skip the jig and your lines wobble; skip the tape and your edges bleed. Neither is fatal, but both cost you a second attempt.
Watch out: a bare table means one tipped water cup can ruin the finish. Lay down cardboard or a plastic sheet first.
The Best Paint for Fabric Shoelaces: Acrylic vs Fabric Paint
Acrylic paint mixed with a fabric medium, or a ready-made fabric paint, are common choices because both can bond to cotton fibers and stay flexible when dry.
Here's how the two options compare:
| Paint Type | Flexibility | Best For | Watch Out For |
|---|---|---|---|
| Fabric paint | High | Wearable laces, edges | Dries slower |
| Acrylic + fabric medium | High | Custom color mixing | Needs correct ratio |
| Straight acrylic | Low | Display or short-term wear | Cracking at bends |
| Fabric dye | Very high | Full-color dips | Hard to control patterns |
Fabric paint is often a practical starting point for beginners, since it can be thinned with water. For anyone following fabric care guidance from the American Cleaning Institute, remember that painted laces should be hand-washed, not thrown in with a hot load.
Prepping and Tensioning Laces for Clean, Repeatable Patterns
Clean, repeatable patterns come from two things: a clean lace and steady tension. Most guides skip tension, which is why their lines look hand-drawn.
Wash new laces in warm water with a drop of mild soap, rinse well, and dry flat.
Stretch the lace across your jig and clip both ends taut, not stretched to breaking.
- Wipe the surface with a dry cloth before painting
- Mark your pattern spacing with a light pencil line
- Tape off edges you want to keep clean
A common mistake is painting a loose, curly lace. It rolls under the brush, your line wanders, and the pattern never repeats evenly.
Step-by-Step: Painting Custom Designs on Shoelaces
Painting custom designs on shoelaces takes six steps: prep, tension, thin, apply, dry, and seal. Follow them in order for a repeatable result.
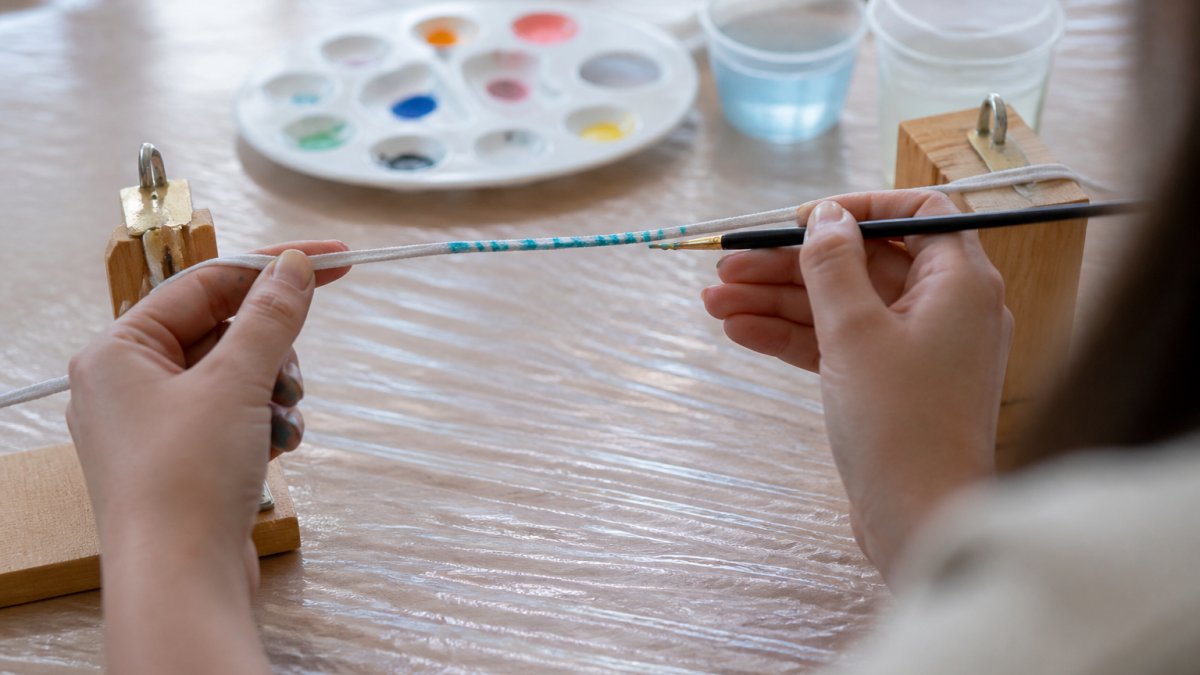
- Prep the lace. Wash, rinse, and dry flat.
- Set the tension. Clip the lace taut across your board.
- Mix your paint. Thin acrylic with warm water and a drop of fabric medium until it flows like cream.
- Apply the color. Brush thin coats along the lace, or dip a section for full coverage. Thin coats beat thick ones every time.
- Dry between coats. Let each coat dry fully before adding the next.
- Seal and finish. Heat-set or apply a fabric sealer once the design is dry.
Thin coats are generally easier to keep flexible than thick ones.
Expected result: a flat, even design that bends without flaking.
Design Techniques: Geometric, Tribal, and Repeat Patterns
Geometric, tribal, and repeat patterns work best on laces because simple shapes survive the curve of a round cord; fine detail gets lost as the lace twists, so bold beats intricate. The real skill is laying out spacing you can repeat on both laces without measuring every mark by eye.
Set up a spacing ruler before you paint
Cut a strip of painter's tape the length of your lace and mark it at even intervals, every 1/2 inch for dots, every 1 inch for stripes or chevrons. Press it alongside the taut lace on your jig as a visual guide, then paint against it. Your pattern repeats because your reference repeats.
For a matched pair, paint the first lace completely, let it cure, then use it as the physical template for the second, lining them up side by side on the jig and copying each mark across. Once both laces match, the same careful alignment can carry into custom hand-painted sneakers, where repeated marks help tie a design together.
Four patterns that survive a round lace
- Even stripes: Wrap painter's tape around the lace at your marked intervals, leaving the gaps you want colored exposed. Paint the gaps, let them dry to the touch, then pull the tape. Wrapping tape around the cord (rather than laying it flat alongside) is what keeps stripe edges straight as the lace curves.
- Dot repeats: Dip the handle end of a small brush, not the bristles, into thinned paint and touch it straight down to the lace. A size 0 brush handle gives a dot roughly 1/16 inch across; a pencil eraser gives a bolder dot. Reload every two or three dots so the size stays consistent.
- Chevrons and zigzags: Tape a shallow V shape at each interval, paint inside the V, and remove the tape while the paint is still slightly tacky. Pulling tape from wet paint smears; pulling from fully cured paint can chip the edge. Slightly tacky is the sweet spot.
Two-tone and half-and-half designs
For a two-tone lace, fold it in half and mark the midpoint with a pin. Tape off one half, paint the other, cure it fully, then reverse. Painting both halves in one session almost always smears at the boundary.
For more pattern inspiration to pair with your painted work, our lacing style guide with six patterns to try shows how different lacing layouts change the look of a finished design. If you'd rather start from a graphic base, pre-printed options like Siliprint Winky Face no-tie laces can serve as a reference point for color and spacing.
How to Seal Painted Shoelaces and Keep Them Flexible
Sealing painted shoelaces is what makes the design last. Sealing can help paint hold up to handling and washing. The goal is a flexible seal, not a hard shell, a stiff seal cracks at the fold lines the first time you lace up.
Two reliable sealing methods
- Heat-setting: once the paint is fully dry (24 hours is a safe minimum), press the lace with a warm iron through a cloth for a few seconds per section. Keep the iron moving and never rest it on the lace. Heat-setting is typically used on cotton and canvas; it is not recommended for elastic laces.
- Fabric sealer: brush a thin coat of flexible fabric medium or sealer over the dry design and let it cure per the product label. This is the safer choice for elastic and synthetic laces because it adds flexibility without heat.
Run a colorfastness test before you wear them
Before installing painted laces, do a three-part test on a scrap of the same lace material or on the hidden end near the aglet:
- Rub test: rub the painted area firmly with a white paper towel for 10 seconds. Any color on the towel means the paint hasn't bonded, add another thin coat and re-cure.
- Wash test: hand-wash the scrap in cool water with a drop of mild soap, rinse, and air-dry flat. Check the water for color and the scrap for fading or stiffness.
- Transfer test: press the dry painted scrap against a white cloth and leave it under a book for an hour. Color transfer here means the seal is incomplete.
A lace that passes all three is ready to wear. One that fails the rub or transfer test needs another sealer coat, not more paint.
Keep the seal flexible
Flexibility comes from thin coats and a flexible sealer: two thin paint coats plus one thin sealer coat flex better than one heavy paint coat plus a thick sealer. Bend the lace sharply at the painted area, if you hear or feel a crackle, the coating is too thick.
How to seal painted shoelaces for washing: hand-wash in cool water with mild soap, then air-dry flat. Air-drying flat is a gentler approach for painted laces. For broader care standards, the FTC's consumer guidance on textile labeling and care is a useful reference on what care claims actually mean.
Troubleshooting and repair
- Bleeding at the edges: tape wasn't pressed down firmly, or paint was too thin. Let it dry, re-tape, and touch up the edge with a barely damp brush.
- Uneven coverage: usually a sign of too-thick paint pooling on one side. Sand the high spot lightly with fine grit once fully cured, then add a thin coat.
- Stiff spots: too much paint in one area. Thin the next coat heavily and work it into the stiff spot to soften the transition.
Painting Elastic No-Tie Laces Without Cracking the Coating
Elastic no-tie laces may call for a lighter touch than cotton, since the stretch can stress paint.
Here's how to handle them:
- Use fabric paint only, never straight acrylic
- Apply the thinnest possible coats
- Avoid painting the stretch zone near the eyelets
Giving the paint time to cure before installing a lace is generally recommended.
If you're working with no-tie laces and want to keep them clean and tangle-free in daily use, our guide on no-tie shoelaces and how to prevent dangling, dirty laces covers the practical side of living with them.
Choosing Your Laces: Paint-Ready Cotton or No-Tie Elastic
The right lace for painting depends on what you want from the finished shoe. Cotton and canvas take paint beautifully and hold detail; elastic no-tie laces offer convenience but need gentler handling.
| Lace Type | Paint Friendly | Flexibility | Best For |
|---|---|---|---|
| Cotton | High | Low | Detailed designs |
| Canvas | High | Low | Bold color blocks |
| Elastic no-tie | Medium | High | Everyday convenience |
| Synthetic blend | Low | Medium | Dye rather than paint |
If you want a canvas lace you can customize from the start, our Shorts canvas no-tie shoelaces give you a paintable surface. And if you're weighing the two categories before you commit, our comparison of elastic laces versus regular laces breaks down fit, security, and convenience side by side.
At uLace, we've been making elastic no-tie laces since 2009. Our laces install with a simple push and pull and come in a wide variety of styles and colors.
Frequently Asked Questions
What kind of paint should I use on shoelaces?
Fabric paint made for textiles is a common choice for cotton laces. Acrylic paint can also be used when mixed with a fabric medium.
Do I need to seal painted shoelaces so the paint doesn't crack?
Sealing is one option to consider for painted laces. Once the paint is fully cured, a thin layer of fabric medium or a flexible textile sealer can be applied and allowed to dry. Hand washing in cool water and air drying is generally gentler on painted laces.
Can you use acrylic paint on fabric shoelaces?
You can, and many sneaker customizers do. One approach is thinning acrylic with a fabric medium or a few drops of water, then building color gradually in thin layers.
Is it better to dye or paint shoelaces for custom designs?
Dye gives an all-over color change and keeps the lace's natural softness, which suits solid color swaps. Paint wins when you want defined patterns, stripes, lettering, or multiple colors on one lace. For elastic no-tie laces, painting with a flexible medium is usually the safer route, since hot dye baths can weaken the stretch core.
Painting your own laces is a fun project, but keeping them tied, clean, and secure every day is the harder job. That's where we come in. uLace laces give you a secure, stretchy fit, a neat and tidy look, and slip-on convenience without any bending or tying. Take our quiz to find the right pair for your sneakers and turn the shoes you already love into slip-ons you'll reach for every morning.
