




How Do You Choose Insoles for Loose Footwear?
Last Updated: November 16, 2026
Quick Summary
Choose loose footwear insoles by first checking shoe volume, not size: if two fingers fit under the instep, pick a thicker full-length insole with a deep heel cup to fill the space. Match the insole to your arch type and the looseness you feel, and remove the factory sockliner first if it is removable.
- A shoe can be the right length and still feel loose because it has too much volume above your foot.
- If two fingers fit easily under the instep, the shoe has surplus volume that a thicker insole will help.
- A wet-foot print showing a full footprint means a low arch, which calls for a flatter insole with gentle support.
- Removing a removable factory sockliner frees up its own thickness, often 2 to 4 millimeters.
- Trim only the toe end of an insole and never trim the heel cup, which holds your foot in place.
Table of Contents
- Start With Shoe Volume, Not Just Shoe Size
- How to Choose Insoles for Arch Support
- Best Insoles for Shoes That Are Too Big
- Full-Length Insoles vs. Heel Inserts
- Match Insole Materials to the Space Inside Your Shoe
- How to Make Loose Sneakers Fit Better
- Trim, Test, and Check the Fit After Installation
- Take the Fit Quiz Before You Buy
- Frequently Asked Questions
Start With Shoe Volume, Not Just Shoe Size
Most people blame size when a shoe feels loose, so they size down. The real issue is usually shoe volume: the total space inside the shoe, top to bottom and side to side.
Insoles can work by filling that extra space. Raising your foot inside the shoe can help the upper hug your instep and keep your heel in place.
Before you shop, measure the gap, not just the length.
The Two-Finger Test and Other Quick Checks
Slide one finger under the top of the shoe near your instep while wearing it. If two fingers fit easily, the shoe has surplus volume, a thicker insole will help.
- Press down on the toe box. If the leather or mesh caves in with no resistance, there's room to fill.
- Walk a few steps. If your heel lifts out of the back, that's heel slip, a volume problem, not a size problem.
- Feel along the sides. If your foot slides sideways, the shoe is too wide for you.
Fit varies a lot by brand for slip-on styles. Our guide to whether Vans slip-ons run small walks through a real example, and if you're comparing Skechers, check whether Skechers slip-ons run true to size before you add anything inside.
How to Choose Insoles for Arch Support
Match the insole's arch height to your own arch height, not to the shoe. An insole that props up an arch that doesn't need propping will press into your foot, and one that's too flat for a high arch leaves you unsupported.
To find your arch type, wet your foot and step on a piece of paper:
- A full footprint means a low arch. You want a flatter insole with gentle support.
- A half footprint means a medium arch. A moderate contour works well.
- A thin strip or just heel and toes means a high arch. You need firmer, more structured support.
Match the Insole to Your Foot Type
Foot width matters too. A wide foot needs an insole that doesn't crowd the sides of the shoe; a narrow foot needs one that fills the gap so your foot stops sliding.
For loose footwear, arch support does double duty: it lifts your foot into the upper and stops the side-to-side slide that makes a roomy shoe feel unstable.
Start with a medium-contour insole unless your wet-foot print says otherwise. You can always go firmer later.
Best Insoles for Shoes That Are Too Big
The best insoles for shoes that are too big are thicker, full-length insoles that take up volume without crowding your toes. But "too big" is not one problem. Excess length, excess width, and excess volume each call for a different fix, and picking the wrong one is why many people buy an insole that makes the shoe feel worse.
Diagnose the Type of Looseness First
Before you shop, run this three-part check while wearing the shoe with its normal socks:
- Length check. Press your thumb down at the very front of the toe box. More than about a half inch of empty space beyond your longest toe means the shoe is too long. An insole can push your foot back slightly, but it cannot shorten a shoe by a full size.
- Width check. Stand and shift your weight side to side. If your foot slides laterally and you feel a gap at the sidewall at the ball of your foot, the shoe is too wide. A wider insole or one with raised side edges can take up some gap, but a shoe a full width too wide usually needs a different size, not an insert.
- Volume check. Slide one finger under the instep while standing. If two fingers fit easily, or the upper caves in when you press the toe box, the shoe has excess volume. This is the problem insoles solve best, because raising the foot fills the space between your instep and the upper.
Most loose shoes are a mix of volume and a little width. Length is the one problem an insole cannot reliably solve, so rule it out first.
Match the Insole Shape to the Problem
Once you know which problem you have, the insole choice narrows quickly:
- Excess volume, whole shoe loose: a thick, full-length insole with a deep heel cup. The full length raises the entire foot so the upper makes contact across the instep, and the heel cup keeps the back of the foot from lifting.
- Excess width, foot sliding sideways: an insole with raised side edges or a wider footprint at the ball and heel. A flat-topped insole fills height but does nothing for lateral slide.
- Heel slip only, rest of the fit is good: a heel insert or a full-length insole with a pronounced heel cup. A heel-only fix is lighter and less likely to crowd the toes.
Decide What to Do With the Factory Sockliner
This step changes the fit more than the insole itself.
- If the original sockliner is removable, pull it out and use it as your template. Removing it frees up its own thickness, often 2 to 4 millimeters, so your new insole can be thicker without making the shoe tight.
- If the original sockliner is glued in, you are adding on top of it, so the new insole has to be thin enough that the shoe still closes comfortably over your instep. Measure the gap first; if two fingers barely fit, a thick insole on top of a fixed liner will overfill the shoe.
- Do not stack two full insoles. The layers shift against each other, the top one bunches at the heel, and you end up with a wobbly, uneven base that is less stable than either layer alone.
Watch out: if the shoe has a stitched-in or glued-in liner and the fit is already snug across the instep, adding any full-length insole will make the shoe uncomfortably tight. A heel insert or a lacing adjustment is the better first move.
Quick Reference by Problem
| What you feel | Likely cause | Insole approach |
|---|---|---|
| Whole shoe feels sloppy, upper doesn't touch instep | Excess volume | Thick full-length insole, deep heel cup |
| Foot slides side to side at the ball | Excess width | Insole with raised side edges or wider footprint |
| Heel lifts out when walking | Heel slip | Heel insert or full-length with firm heel cup |
| Toes touch the front | Excess length or tight toe box | Do not add thickness at the toe; consider a different size |
If you are unsure which row you fall into, start with a medium-thickness full-length insole and remove the factory sockliner if it comes out. That combination fixes the most common case, general looseness, without overfilling the shoe.
Full-Length Insoles vs. Heel Inserts
Full-length insoles fill volume across the whole shoe and support the arch. Heel inserts target one spot: the back of the shoe, where heel slip happens.
| Feature | Full-Length Insoles | Heel Inserts |
|---|---|---|
| Volume added | Across the whole foot | Heel area only |
| Arch support | Yes, built in | Usually none |
| Best for | Shoes that feel too roomy overall | Minor heel slip in an otherwise good fit |
| Toe room impact | Can reduce it if too thick | None |
| Trimming needed | Often, at the toe | Rarely |
Pick full-length when the whole shoe feels loose. Pick heel inserts when the fit is good except for a slipping heel. Even with the right insole, your choice of socks like Purely Alpaca remains a critical factor in managing the internal volume of your footwear.
Match Insole Materials to the Space Inside Your Shoe
Material choice comes down to one question: how much space do you need to fill, and how much room can you spare? Each material behaves differently inside a shoe.
| Material | Feel | Volume Added | Best For | Watch Out For |
|---|---|---|---|---|
| Gel | Soft, squishy | Low to medium | Pressure relief under heel and forefoot | Can feel unstable in a very loose shoe |
| Foam | Cushioned, springy | Medium to high | Filling volume in roomy sneakers | Softer foams flatten over time |
| Cork | Firm, molds to your foot | Medium | Stability and arch support | Less shock absorption |
| Leather | Thin, breathable | Low | Dress shoes and mild looseness | Little cushioning |
For loose footwear, foam and cork do the heavy lifting. Foam gives you cushion plus volume. Cork gives you firm support that holds its shape.
A common mistake is buying the softest insole you can find.
How to Make Loose Sneakers Fit Better
Insoles are one fix for loose sneakers, not the only one, and sometimes not the best first move. Before you spend on inserts, try the cheaper fixes.
Start with your laces. Most people tie their sneakers once and never adjust them again.
We've put together a full walkthrough on how to fix loose sneakers, including lace techniques and fit adjustments. If your laces feel stiff or too short to work with, our guide on how to loosen your shoelaces covers the other direction.
And if the real goal is easy on-and-off, you might skip the fitting battle entirely. Here's how to make sneakers slip on without wrecking the fit.
Trim, Test, and Check the Fit After Installation
Trimming is where most insole installs go wrong. An insole a hair too long will curl at the toe or push your foot back, and the shoe fits worse than before. Trim conservatively, then run measurable checks before you commit.
Trim in Small Steps
- Pull out the original sockliner if the shoe has a removable one. Use it as your template, trace its outline, not the shoe's interior, because the liner already accounts for the shoe's curves.
- Trace the outline onto the new insole with a pen. If the new insole is longer than the template, mark the trim line at the toe only.
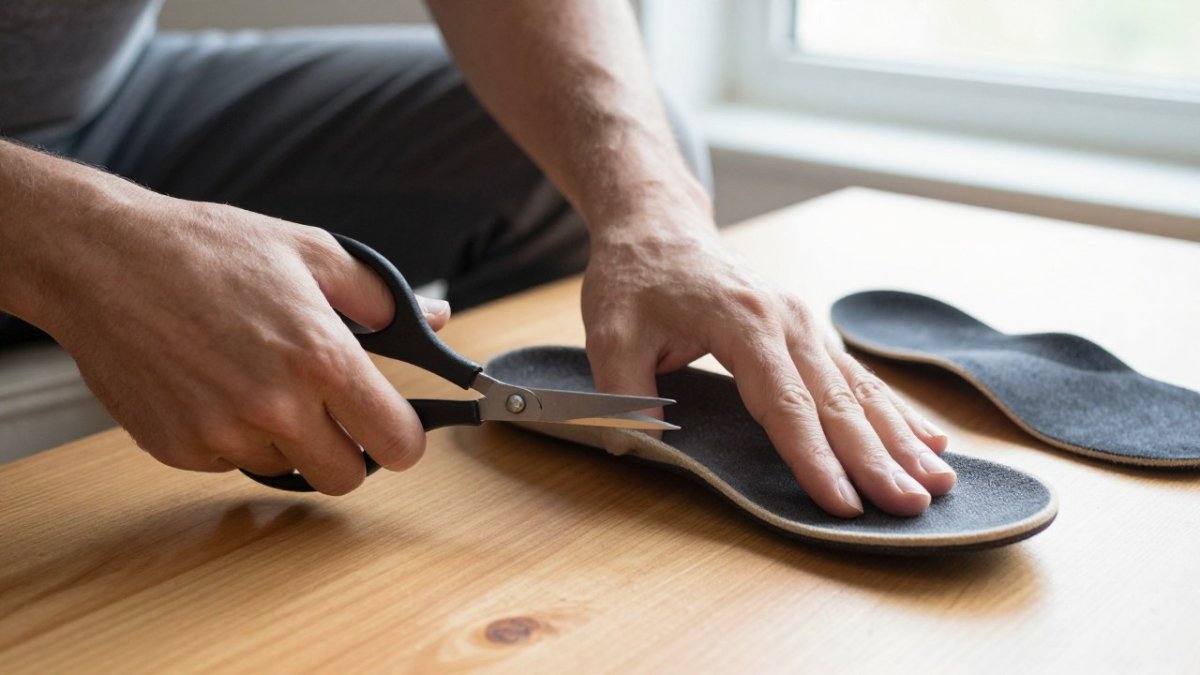
- Cut with sharp scissors, a little at a time. Cut less than you think you need; you can always remove more, but you cannot add material back.
- Test the fit inside the shoe before you trim again. Slide the insole in, press it flat, and check that it lies smooth with no curl at the toe or heel.
- Trim only the toe end. Never trim the heel cup, the raised sides and back are what hold your foot in place, and cutting them down ruins the fit.
Run the Post-Installation Fit Checks
Once the insole is in, put the shoe on with the socks you will actually wear and stand up. Walk through these checks in order:
- Toe room. With your heel seated in the heel cup, press down at the front of the toe box. You want roughly a thumb's width, about half an inch, beyond your longest toe. If your toe touches the end or the insole curls up under your toes, the insole is too long or too thick at the front.
- Heel hold. Walk a few steps and try to lift your heel out of the back of the shoe. If it still rises noticeably, the heel cup is not deep enough or the insole is too thin at the back. If your heel feels pinched or the back of the shoe digs in, the heel cup is too aggressive.
- Lateral movement. Stand and shift your weight side to side. Your foot should not slide across the insole. If it does, the insole is too narrow or too flat for the shoe's width.
Know When the Insole Is the Wrong Fix
Some fit problems survive a correct insole install, and that is useful information. If heel slip persists after a deep-heel-cup insole and a proper lacing adjustment, the shoe may be too long rather than too roomy.
Watch out: do not judge the fit while sitting down. Volume problems and heel slip only show up under your body weight, so every check above has to be done standing and walking.
Take the Fit Quiz Before You Buy
Guessing at insole thickness wastes money. So does buying a pair that's too firm or too soft for your foot.
- How much room is actually in the shoe? Two fingers of space means you need a thicker insole.
- What's your arch type? Your wet-foot print tells you.
- What activity will you do? Walking and standing need cushion; running needs stability.
Answer those five and you'll know whether you need full-length or heel-only, thick or thin, foam or cork.
Take the quiz to find the right setup for your shoes and your routine.
Loose footwear doesn't have to mean a sloppy fit.
Frequently Asked Questions
Can insoles make shoes that are too big fit properly?
Insoles can take up volume in a loose shoe, especially in the heel and midfoot, but they cannot shorten a shoe that is a full size too long. A full-length insole adds roughly 2-4 mm of thickness under the foot, which improves heel hold and reduces sliding. If your heel still lifts after adding an insole and adjusting the laces, the shoe is likely too long and should be replaced.
Should I use a full-length insole or a heel insert for loose shoes?
Full-length insoles are the better choice for loose footwear because they fill space under the entire foot and stop the foot from sliding forward. Heel inserts only address heel slip and can push the foot forward into the toe box, creating pressure on the toes. Use heel inserts only when the shoe fits well in length and the sole problem is isolated heel lift.
How do I know if my shoes are too big or just need insoles?
Check three things: space at the toe (about a thumb's width is normal), heel slip while walking, and whether the shoe feels loose across the midfoot. If the shoe is less than half a size too large, an insole plus a tighter lacing pattern can fix the fit. If your foot slides forward and your toes touch the front, the shoe is too long for an insole to correct.
Do I need to remove the original sockliner before adding an insole?
Yes, in most cases. Removing the factory sockliner frees up 2-4 mm of depth so the new insole sits flat and does not crowd the toes. If the original liner is glued in, try a thinner insole instead of forcing it. After installation, walk for ten minutes and check for pressure points at the arch, heel, and toes before wearing the shoes all day.
