




DIY No Tie Shoelace Hacks for Parents: 2026 Guide
Table of Contents
- DIY No Tie Shoelace Hacks That Actually Work
- How to Make Shoelaces No Tie: Step-by-Step
- Best No-Tie Shoelace Brands for Kids
- Benefits of Slip-On Sneaker Conversions
- Sensory-Friendly and Age-Appropriate Lacing Solutions
- DIY vs. Store-Bought No-Tie Laces: Cost and Durability
- Troubleshooting Loose Laces and Tension Problems
- Conclusion
- Frequently Asked Questions
Last Updated: September 21, 2026
DIY No Tie Shoelace Hacks That Actually Work
Most parents discover DIY no tie shoelace hacks the hard way: at 7:42 a.m., one shoe on, one shoe missing, and a kindergartner already halfway out the door. This guide covers the home fixes that hold up, the step-by-step conversion method, and the sensory-friendly tweaks most roundups skip.
The Loop-and-Swoop Tuck Method
The loop-and-swoop tuck is the fastest DIY fix, and it costs nothing. Tie the lace normally, then tuck both loops and the tail ends under the crossed laces against the tongue.
Elastic Band and Binder Clip Hack
A binder clip and a hair elastic turn any lace into a quick-release fastener in under a minute: thread the lace ends through the clip's wire loops, snap it shut, and slide the elastic over the top eyelet for tension.
The Hair Elastic Loop (Best for Toddlers)
For the youngest kids, skip the clip entirely. Loop a thick hair elastic through the top eyelet on each side, stretch it across to the opposite eyelet, and hook it. The shoe becomes a slip-on with no knot, no clip, and nothing to pop off mid-stride.
The Double-Eyelet Elastic Weave (Best for Sensory-Sensitive Kids)
This DIY version of a true no-tie conversion is the one to use for sensory processing differences: instead of one tight knot point, pressure is distributed across the whole shoe.
- Thread a thin elastic cord (1/16-inch or 2 mm works well) through the bottom two eyelets and knot it inside the shoe.
- Crisscross upward, but instead of pulling tight at each crossing, leave a small loop of slack.
- At the top, thread both ends through a cord lock (also called a toggle) rather than tying them.
- Trim nothing, tuck the excess inside the shoe.
What Actually Fails, and Why
Most DIY hacks fail for one of three reasons:
- The clip or toggle is the weak point. Plastic clips crack; metal clips bend. Anything that snaps open under load pops off during tag.
- The elastic loses recovery. Cheap hair elastics stretch out permanently within a week or two. Look for elastics that snap back to shape, not thin multi-packs.
- The lace end frays. Cut elastic frays and pulls through the eyelet. Never cut, tuck.
How to Make Shoelaces No Tie: Step-by-Step
Learning how to make shoelaces no tie takes about five minutes per shoe. The method below works on almost any sneaker with standard eyelets.
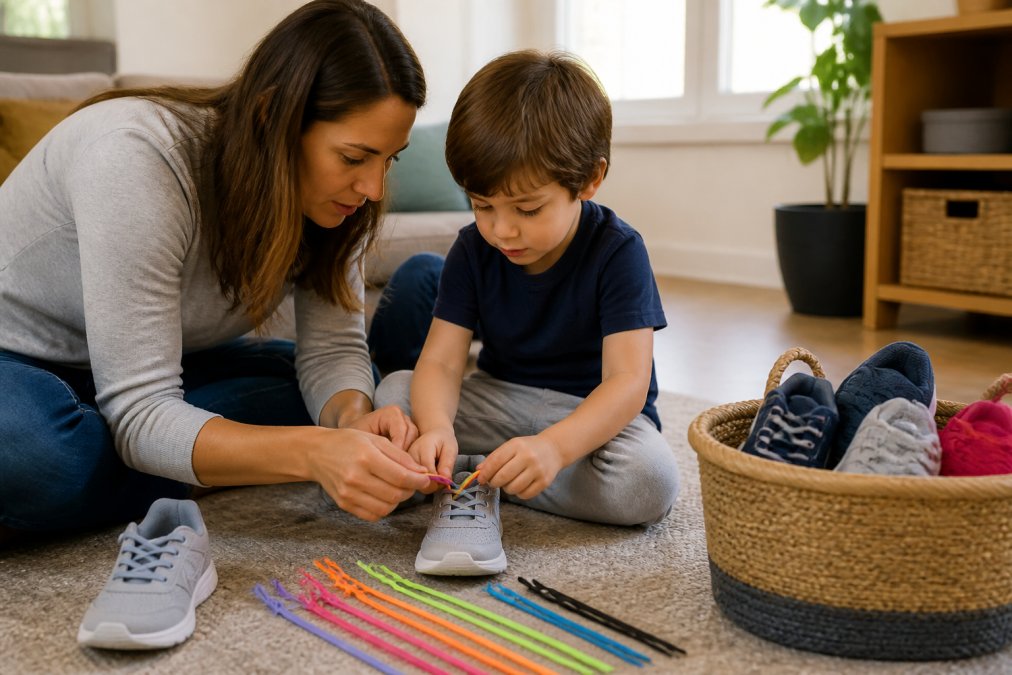
- Pull the old laces out completely and check the eyelets for sharp edges.
- Thread the new elastic lace in a crisscross pattern, starting at the bottom pair of eyelets.
- Work upward, keeping tension even on both sides.
- At the top, push the lace ends through the final eyelets and secure them with the included clips or by tucking them inside the shoe.
- Test the fit: slide your foot in and out three times. The shoe should slip on easily and feel snug once in.
- Adjust tension at the top eyelets until the heel doesn't lift when your child walks.
Best No-Tie Shoelace Brands for Kids
The best no-tie shoelace brands for kids are the ones built specifically for small feet and constant motion. uLace Kiddos sets start at $5.99 and come in colors kids actually want to wear, from uLace Kiddos - Rainbow to uLace Kiddos - Medium Grey, which the brand notes is popular with autism families.


| Option | Price | Best For | Notes |
|---|---|---|---|
| uLace Kiddos | $5.99 | Ages 3-8, everyday sneakers | Elastic, no-tie, many colors |
| uLace Classic | $6.49 | Older kids, adult sneakers | Fits classic-styled shoes |
| uLace ProFormance | $14.99 | Sports and running | Built for high activity |
| DIY binder clip hack | Under $5 | A quick temporary fix | Pops off during play |
What to Look for in Kids' No-Tie Laces
Start with stretch and recovery: a good elastic lace stretches when the foot pushes in and snaps back to hold the shoe snug. Look for durable materials that won't fray after a month of playground use, and check that lace length matches the shoe's eyelet count. Prioritizing these resilient materials ensures that your child's footwear remains functional throughout the day, much like the selection of durable kids apparel that withstands the rigors of constant movement.
Benefits of Slip-On Sneaker Conversions
The benefits of slip-on sneaker conversions go beyond saving time. Kids gain independent dressing skills, which builds confidence in the preschool years. Parents stop bending over a dozen times a day.
Sensory-Friendly and Age-Appropriate Lacing Solutions
Sensory-friendly lacing removes the two things most likely to bother a child: a tight knot pressing on the instep and the sound and motion of constant retying. Elastic laces keep even, gentle pressure across the whole shoe instead of one tight point.
DIY vs. Store-Bought No-Tie Laces: Cost and Durability
DIY hacks win on upfront cost and lose on durability. The real question is whether the savings are worth the repeat labor.
The Honest Cost Math
A DIY setup, a pack of hair elastics and a couple of binder clips, runs a few dollars and covers several pairs of shoes. A set of elastic no-tie laces runs in the same low single-digit range per pair. On paper, DIY looks cheaper.
Durability: What Actually Wears Out
| Failure Point | DIY Hack | Store-Bought Elastic Lace |
|---|---|---|
| Clip or toggle | Cracks or pops off within days of active play | Molded clasp designed for repeated flex |
| Elastic recovery | Hair elastics stretch out permanently in 1-2 weeks | Elastic formulated to snap back for months |
| Lace ends | Fray if cut; pull through eyelets | Finished aglets or sealed ends |
| Fit consistency | Varies with every re-thread | Set once, holds tension |
A simple home stress test: put the shoe on your child, have them run across the yard and back five times, then check whether the lace slipped, the clip popped, or the elastic went slack. Most DIY setups fail within two rounds; a properly installed elastic lace usually passes.
The Hidden Cost: Shoe Damage
There's a durability cost that doesn't show up in the lace budget: forcing feet into laced shoes without untying them crushes the heel counter and stretches the collar. Over a school year, that's the difference between a sneaker that holds its shape and one that looks broken down by spring. Both DIY and store-bought no-tie setups prevent this.
When DIY Is the Right Call
DIY makes sense when:
- You're testing whether your child will tolerate a no-tie setup at all.
- You need a fix tonight and the store is closed.
- Your child is between sizes and you don't want to invest in laces for shoes they'll outgrow in a month.
When Store-Bought Wins
Store-bought elastic laces win when:
- You're outfitting more than one pair of shoes.
- Your child is in gym class or organized sports, where clips and hair elastics fail fast.
- Your child has sensory sensitivities and needs consistent, even pressure, the kind a cord lock delivers and a binder clip can't.
- You want to install once and forget it for the season.
One caveat: cheap generic elastic laces can lose their stretch just like hair elastics. Look for brands with a stated guarantee rather than the lowest price on the shelf.
Troubleshooting Loose Laces and Tension Problems
Loose laces almost always trace back to tension, not the lace itself. Work through this list before buying replacements.
- Heel lifting: tighten the top two eyelets, or add an extra crossing near the ankle.
- Lace slipping through the eyelet: check for smooth plastic tips and re-thread so the end tucks inside the shoe.
- Shoe feels too tight: loosen the bottom eyelets first; the foot enters at the bottom, not the top.
- Lace stretched out over time: elastic loses recovery with heavy use, so replace the set.
- Knot coming undone: switch to a double knot or move to elastic laces entirely.
Conclusion
Morning routines are hard enough without a shoe-tying battle at the door. Whether you start with a five-minute DIY fix or move straight to elastic laces, the goal is a secure fit your child can manage alone.
Frequently Asked Questions
What are some ways to lace shoes without tying for kids?
The fastest way is to swap standard laces for elastic no-tie laces, which turn any sneaker into a slip-on. For a temporary fix, try the loop-and-swoop tuck: tie a regular bow, then tuck the loops under the laces crossing the top of the shoe. You can also thread a short elastic band through the top eyelets and hook it around the knot. Each method removes the need for a daily bow, though elastic laces hold up best through recess and gym class.
How do I turn regular shoelaces into no-tie laces?
Start by removing the original laces. If you are reusing them, slide a small elastic band through the top eyelet on each side and loop the lace ends through it before tying a hidden knot. For a cleaner result, use purpose-made elastic laces like uLace Kiddos, which come in colors such as White, Rainbow, and Lavender for $5.99. Thread them through the eyelets, adjust the tension once, and the shoe becomes a slip-on.
Are no-tie shoelaces safe for active children?
Yes, when they are installed correctly and sized to the shoe. Elastic laces maintain steady tension across the instep, so the shoe stays on during running and jumping without needing a knot. Check the fit by having your child run a few steps and pivot; the heel should not lift. Replace laces if you notice fraying near the eyelets or if the stretch feels loose. uLace has been making no-tie laces since 2009 and offers a guarantee on its products.
How do I keep shoelaces from coming untied all day?
Traditional cotton laces loosen because the knot relies on friction. Elastic no-tie laces solve this by holding tension without a bow. If you prefer standard laces, double-knot them and tuck the ends under the laces crossing the top of the shoe. You can also treat the lace tips with a small amount of hairspray to add grip. For a permanent fix, switch to elastic laces and adjust the tension once so the shoe slips on and stays put.